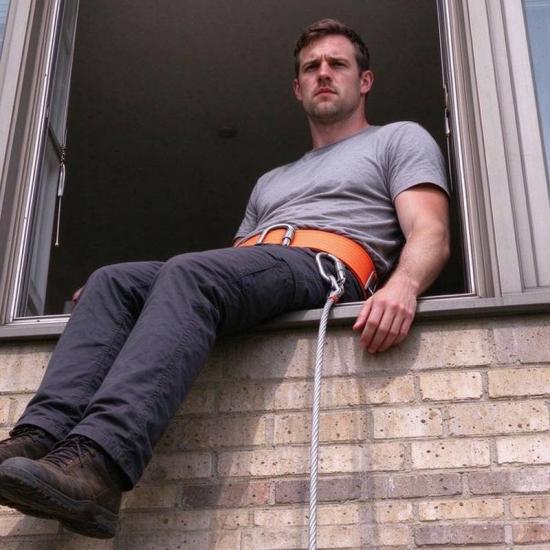
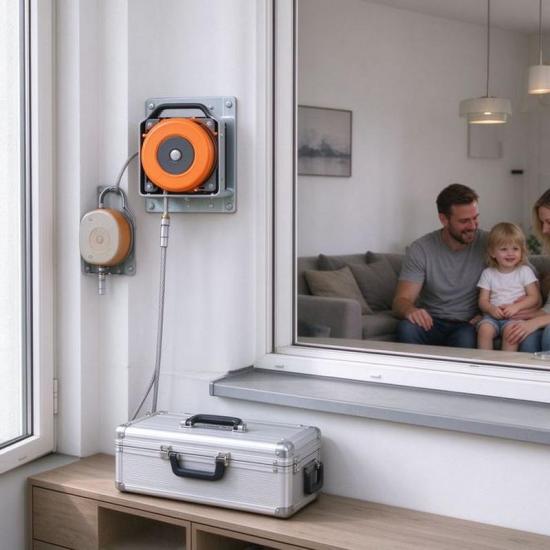
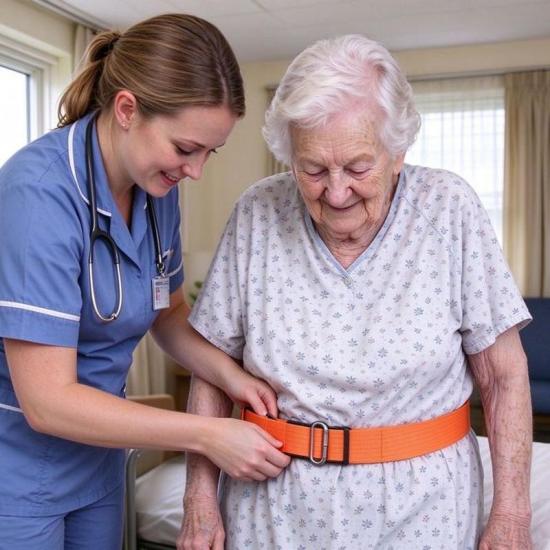
This Rescue Descent Device Offers Controlled-Speed Descent With Centrifugal Brake. It Comes With Steel Wire Rope, Safety Belt And Mounting Brackets, Fits Apartments, Offices And Nursing Homes. Reliable Emergency Escape Gear For Fast Evacuation During High-Rise Fire Accidents.
Note: Price for reference only. Exact price based on quantity, size, weight and custom details.
model no. :
E-01Brand:
YRFmarket price :
$150.9sale price :
$74.9price range :
11-100/$74.9 100-500/$74.1Color :
Whiteport of dispatch :
Guangdong/GuangzhouPayment :
TT, Paypal, Western Unionmin order :
30original region :
Made in ChinaLead Time :
5-15days
Reciprocating High-Rise Escape Descent Device
A mechanical escape descent device that lets anyone — elderly, children, or untrained adults — escape a burning high-rise through a window at a safe automatic speed. No power. No training. One unit serves a whole family or floor.
Pick the model rated for your building height. After each use, the unit resets automatically for the next person. Maintenance takes minutes, with no tools needed. Mount it on the wall so it is always within reach.


On this page
What Is a Rescue Descender & When You Need It
Specifications at a Glance (3 Models)
How the Auto-Speed Brake Works
Where & How to Install
Descender vs Rope vs Ladder
How to Choose the Right Model
Common Concerns Before You Buy
FAQ (14 Questions Answered)
Bulk Order & OEM
Compare with Our Other Rescue Products
YRF makes a full family of high-rise rescue equipment. Each product suits a different building type and user group.
Self-Locking Escape Rope Kit – portable rope kit for backup and travel use.
Nylon Wire Escape Ladder – steel-core ladder for 2-3 storey buildings.
Special Needs Rescue Harness Kit – padded harness for elderly, children and wheelchair users.
Portable Professional Rescue Descender – reusable unit for fire departments and rescue teams.
What Is a Reciprocating Rescue Descender and When You Need
Q: How fast does the escape descent device descend? This escape descent device lowers you at a controlled speed with no handle to grip. When a fire breaks out in a high-rise building, elevators shut down immediately.
Stairwells may fill with smoke and heat. Residents trapped above the fire floor have limited options. This is why a escape descent device matters. An escape descent device mounted by the window becomes critical window evacuation equipment. Per NFPA escape planning guidance, high-rise buildings should provide multiple means of evacuation.
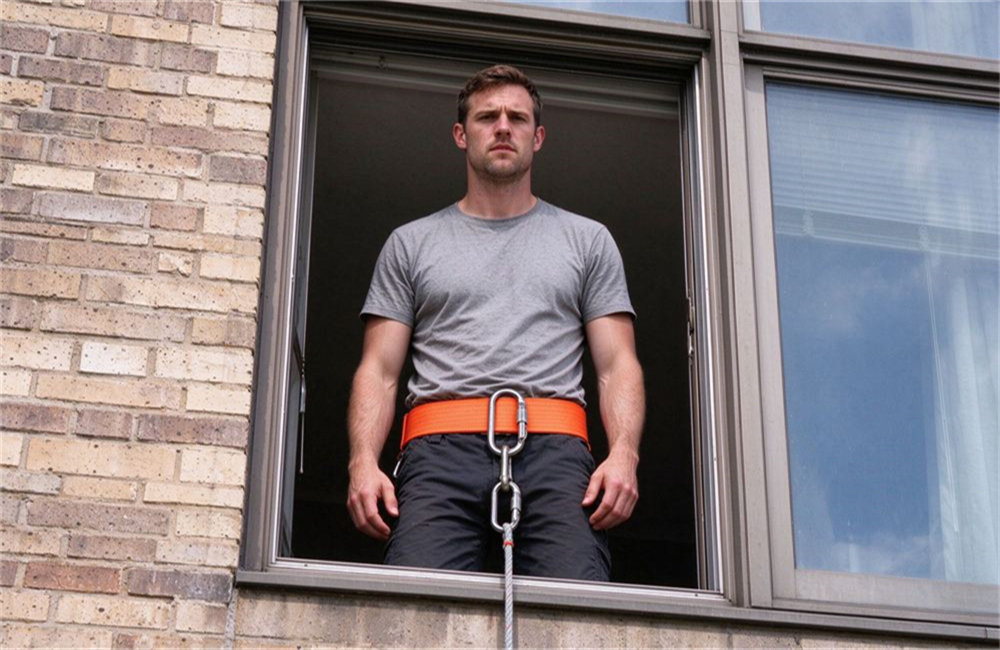
A escape descent device gives them another option. It mounts next to a window as a building evacuation device. You clip on a safety belt. The device lowers you to the ground at a controlled, automatic speed.
Most basic escape ropes require you to control your own speed. You grip the rope and feed it through your hands. That sounds simple. It is not simple when you are scared.
Elderly people may not have the hand strength. Children may not have the coordination. Even fit adults can panic and lose their grip in a real fire.
A reciprocating rescue descender solves this problem. The internal centrifugal brake adjusts speed automatically. Your body weight sets the pace. You do not squeeze anything. You do not steer anything.
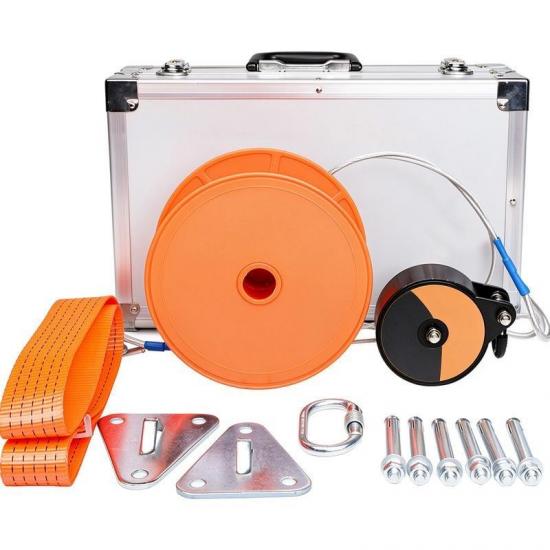
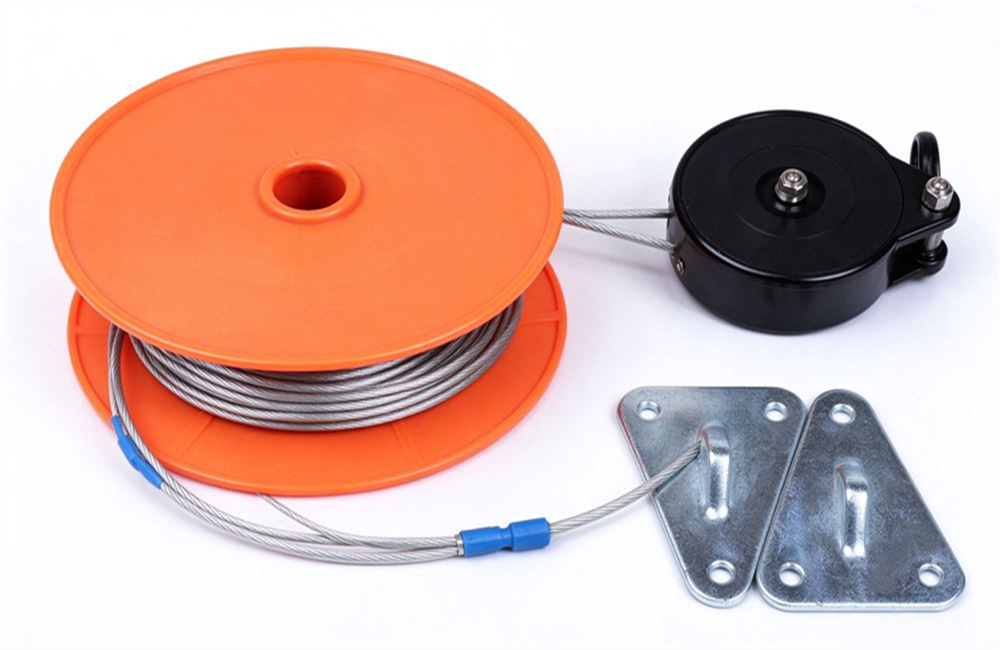
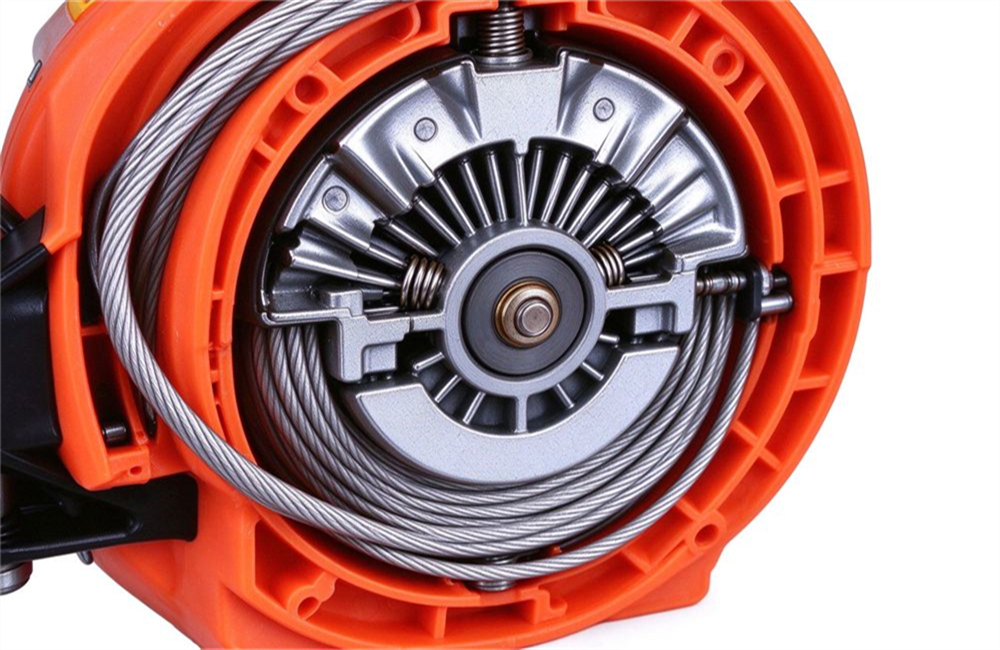
The complete system has four core parts. This multi-person escape system starts with an aluminum alloy housing unit that contains the brake mechanism. An aircraft steel cable that pays out and rewinds. An orange safety belt that connects you to the cable. A galvanized steel bracket that bolts to the wall.
It is not a rope wrapped around a pulley. This escape descent device is a purpose-built mechanical system. The brake is the key difference. It is rated for repeated use by multiple people.
Unlike a basic self-locking escape rope kit, the descender does not need manual braking. Unlike a ladder, you do not climb. You hang in the harness and descend. The cable pays out automatically.
After one person reaches the ground, the cable rewinds itself. The next person clips on and goes. This is what "reciprocating" means. One device serves a whole family. It serves a whole office floor.
The unit runs on pure mechanical force. No battery. No power supply. No electronics. That is critical during a fire. Power may be cut. Elevators may stop. The descender keeps working.
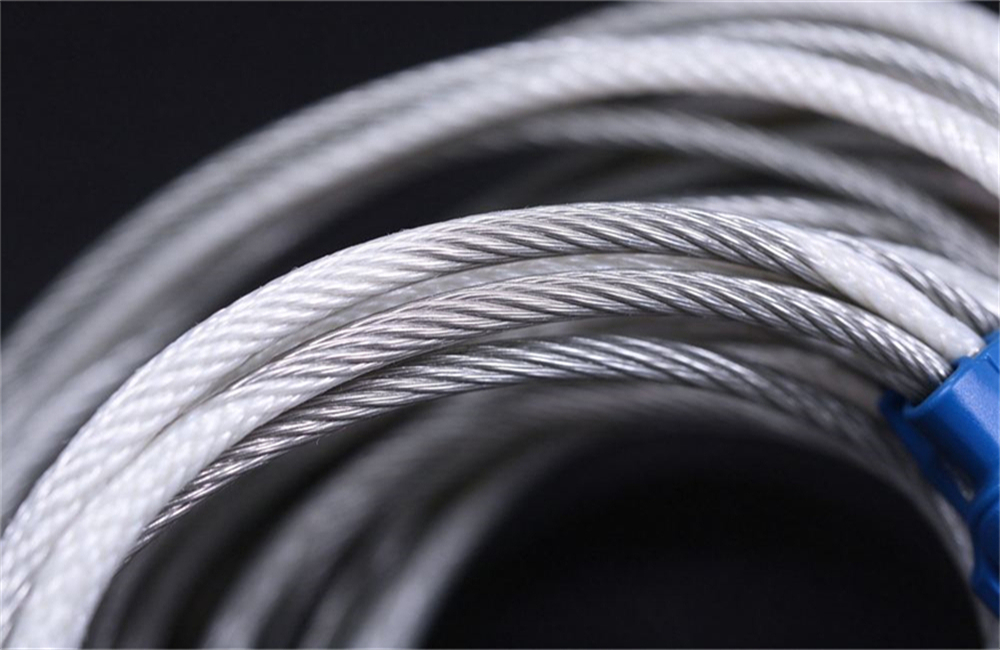
The steel cable has a nylon outer jacket for wear protection. The orange safety belt is made of high-strength polyester webbing. The steel carabiner is tested to withstand over 10 kN. Both cable and belt meet national fire safety standards for rescue use.
Standard models cover about 30 meters of descent. That equals roughly 10 floors at about 3 meters per floor. Heavier users descend slightly faster. Lighter users go slower. The brake keeps everyone within a safe range.
The whole unit weighs about 4 to 5 kg. The housing is aluminum alloy. The mounting bracket is galvanized steel. It can stay on the wall for years without rusting.
An nylon wire fire escape ladder works well for 3 to 6 floors. A basic rope kit works for 5 to 15 floors with fit adults. A escape descent device is designed for 10 floors and above. It is also the safer choice when elderly people or children are involved.
This page walks through everything. It covers the specifications. It explains how the brake works. It shows installation. It compares ropes and ladders. It covers choosing the right model and ordering in bulk.
Why a descent device matters
During a high-rise fire, two things usually go wrong. The power fails, so elevators stop. The stairwell fills with smoke, so the safest exit route becomes unusable.
People on upper floors are left with few options. They may wait for firefighters. They may try to climb down a rope they have never used. They may open a window and hope.
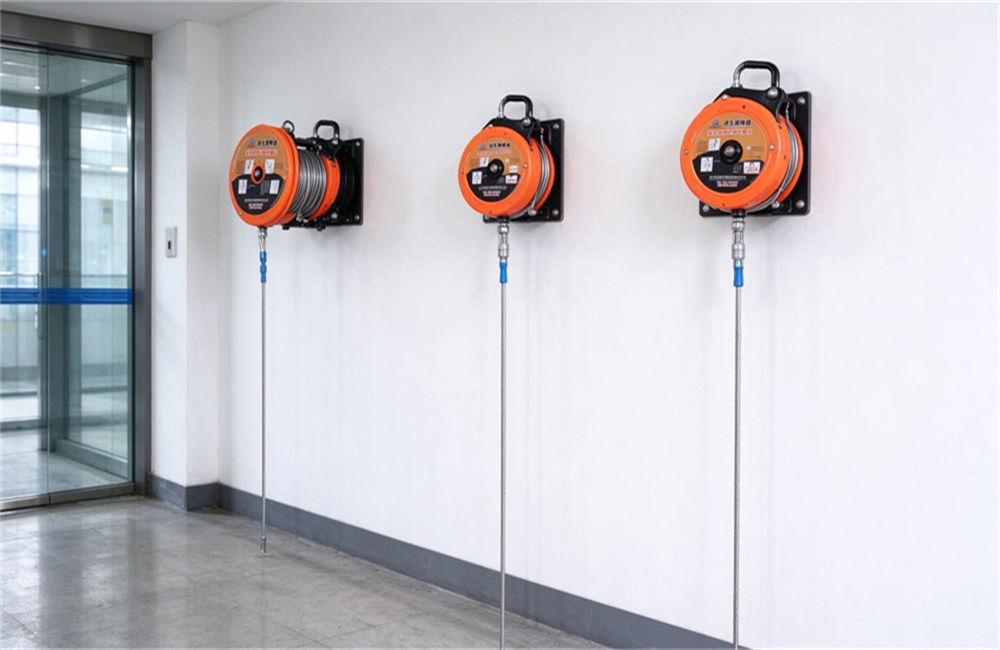
A escape descent device is different. It is installed before the emergency. This auto braking descent device sits on the wall as high-rise rescue equipment. It is ready at any time. When the moment comes, you do not need to improvise.
It is also reusable. Unlike a single-use escape hood or a one-time fire blanket, the descender can be tested and reused. It stays ready on the wall year after year. It is there for every fire drill. It is there if a real emergency happens.
A real high-rise fire timeline
In the timeline below the escape descent device is ready at minute zero. Minute 0: An overheated transformer on the 8th floor catches fire. The building alarm sounds. Power to the elevators cuts automatically as a safety measure.
Minute 2: Residents on the 15th floor wake up or smell smoke. They head for the stairwell. But smoke is already rising up the stairwell shaft. The stairwell becomes unusable within 5 to 10 minutes.
Minute 5: Residents on the 15th floor are now trapped. The stairs are filling with smoke. The elevators are off. They have nowhere to go except the windows.
If they have a descent device mounted at the window, they put on the harness, clip the carabiner, and step out. Within 30 seconds, the first person is on the ground. The next follows within a minute.
If they only have a window, they are stuck. They may wave a towel. They may wait for firefighters, who may not reach the upper floors for an hour or more.
Rescue Descender Specifications at a Glance
We offer three standard escape descent device models. This building escape device covers a different building height range in each size. There is no need to guess which one fits your building.
Core parameters you should know
Key parameters of this escape descent device are listed in the table. This escape descent device follows the national fire safety standard per ISO safety frameworks for evacuation systems
Follow OSHA emergency action plan guidance when planning building evacuation routes.
The cable, harness, and brackets are selected for high-strength performance under real evacuation conditions. Every batch goes through functional testing before shipment.
The working load covers 30 to 100 kg, tested at standard load 70 kg per GB21976.2. That covers most adults.
The descent speed is self-adjusting based on body weight, staying between 0.16 and 1.5 m/s. The brake ensures you never descend too fast.
The cable uses high-strength steel wire. The nylon outer jacket protects against UV, moisture, and abrasion. This is not a clothesline rope. It meets national fire safety standards for cable strength.
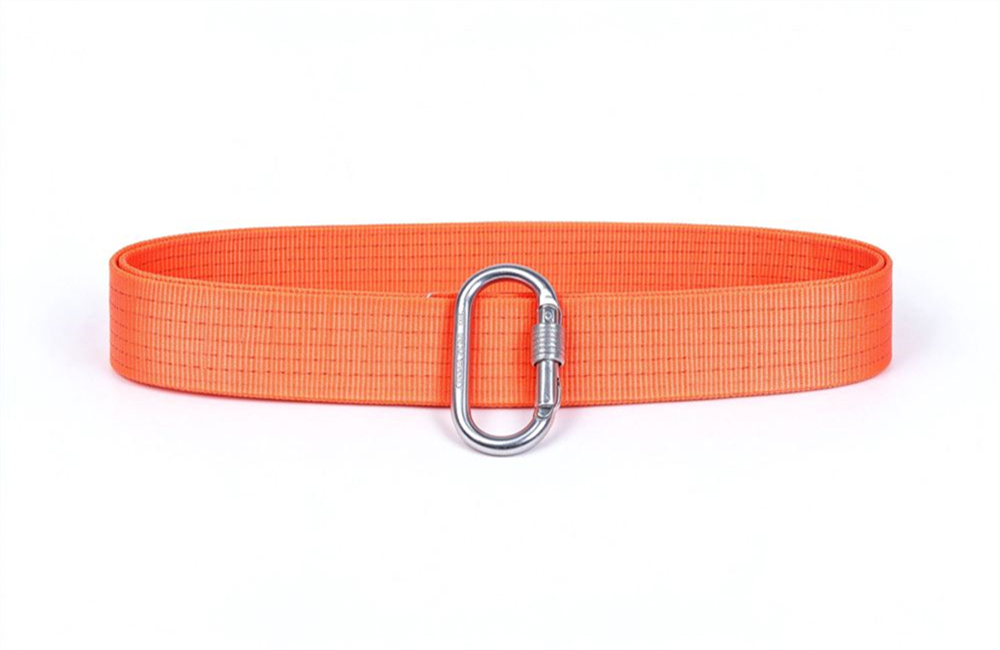
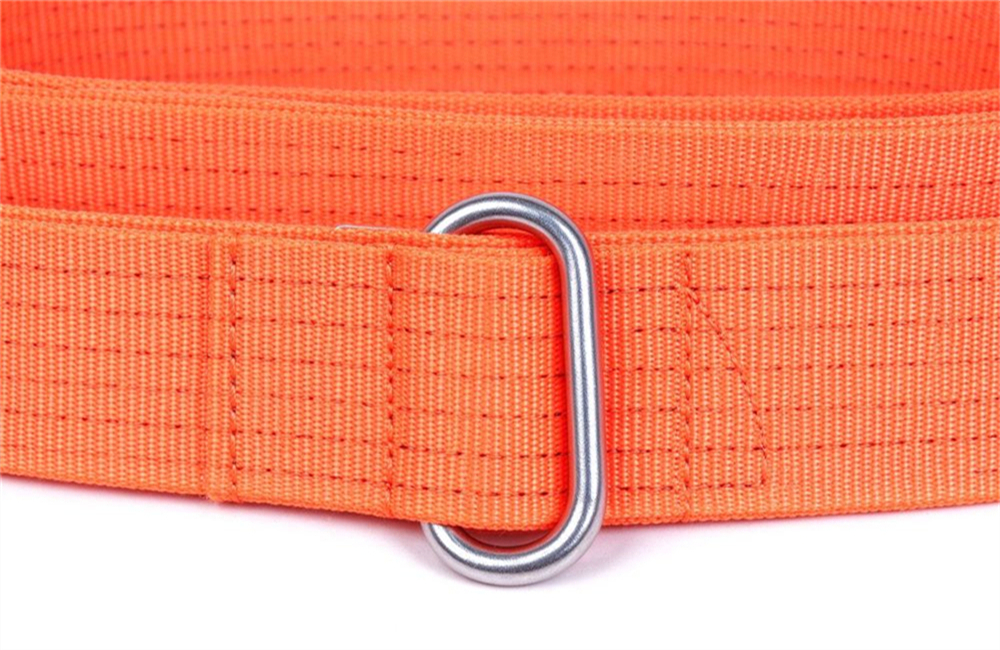
The safety belt is made of orange polyester webbing with a steel D-ring and auto-locking carabiner.
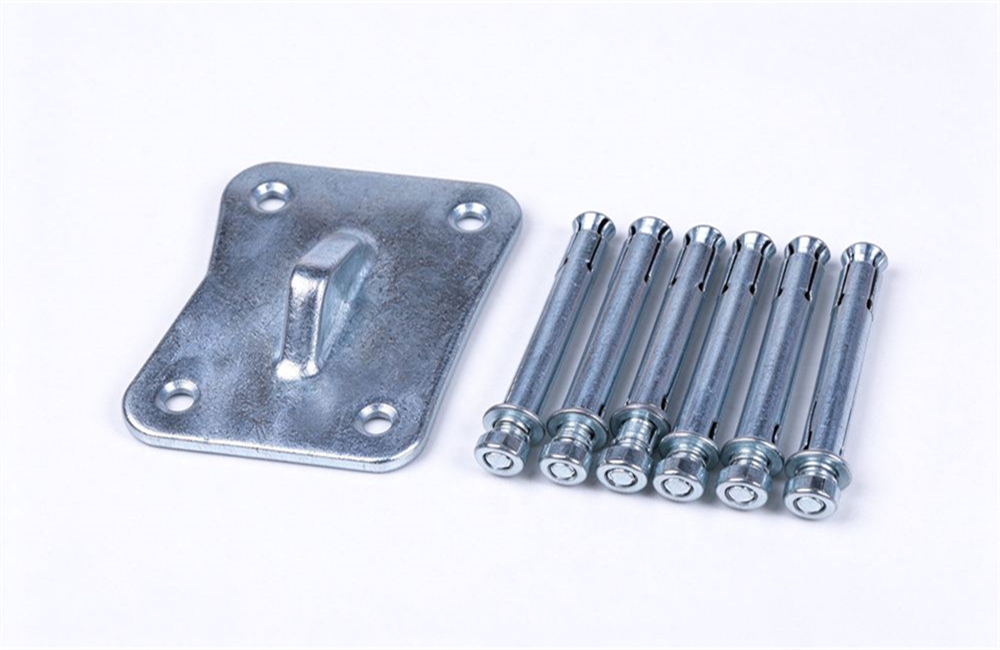
The housing is made of aluminum alloy. It is lightweight and corrosion-resistant. The mounting brackets are triangular steel plates. They are galvanized against corrosion.
The unit is designed for indoor wall mounting. It works in normal indoor building conditions.
What comes in the box
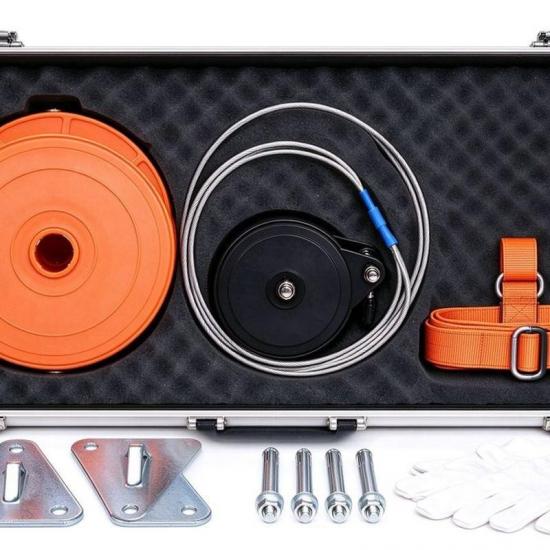
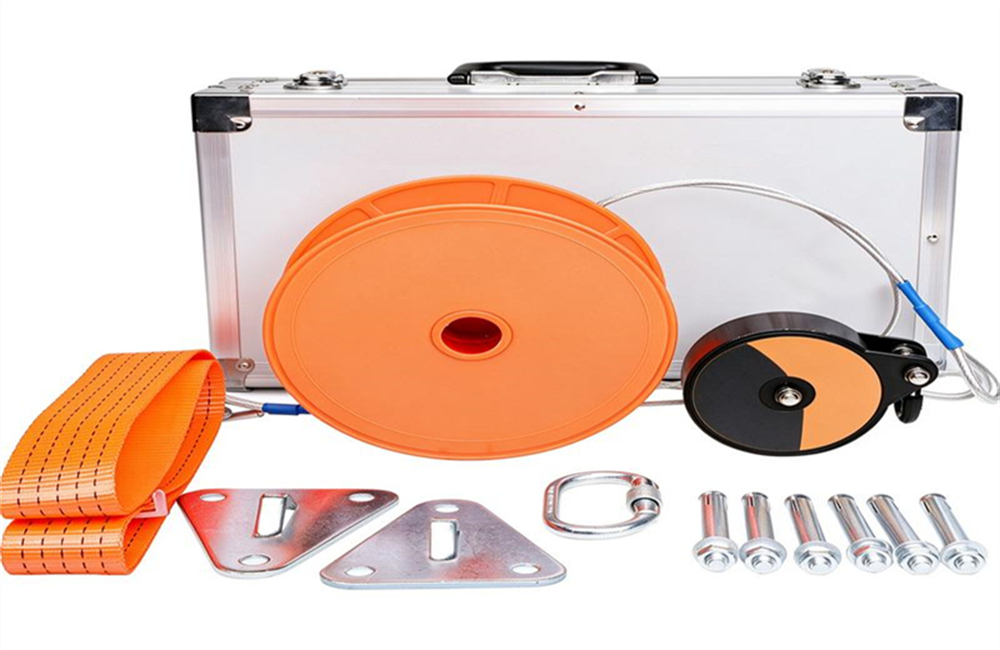
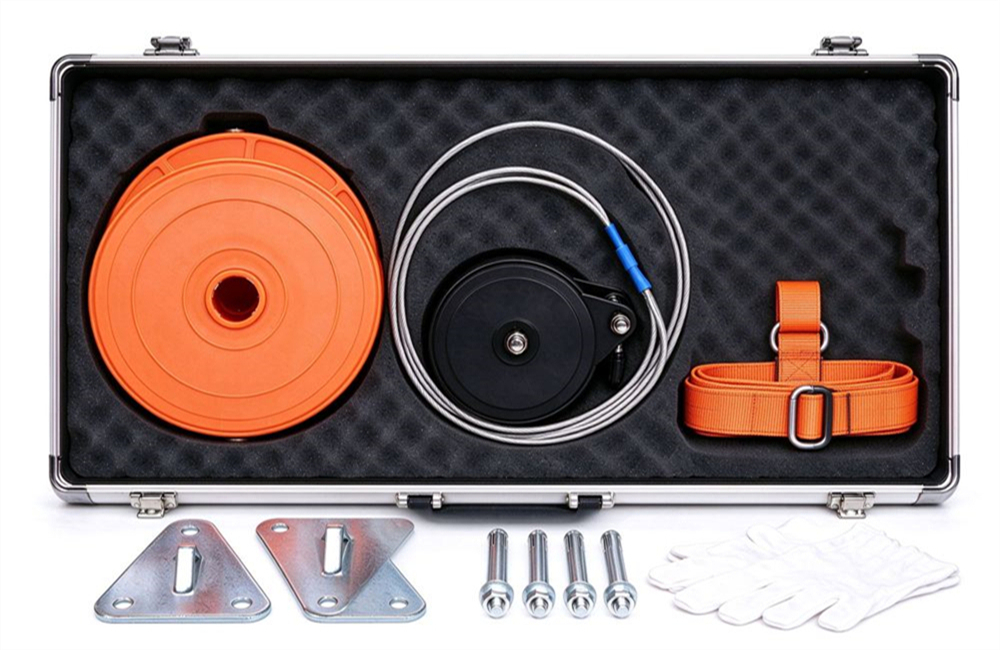
The box contains the escape descent device, belt, carabiner, and case. Each complete kit includes the descender unit itself. The aircraft steel cable pre-spooled inside. The orange safety belt. Two triangular steel mounting brackets. Six expansion bolts.
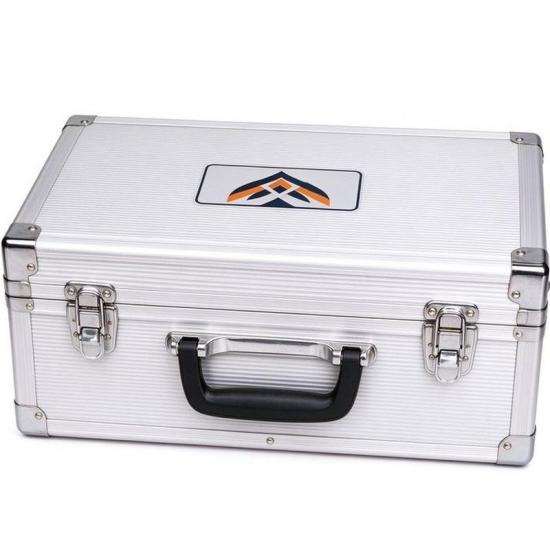
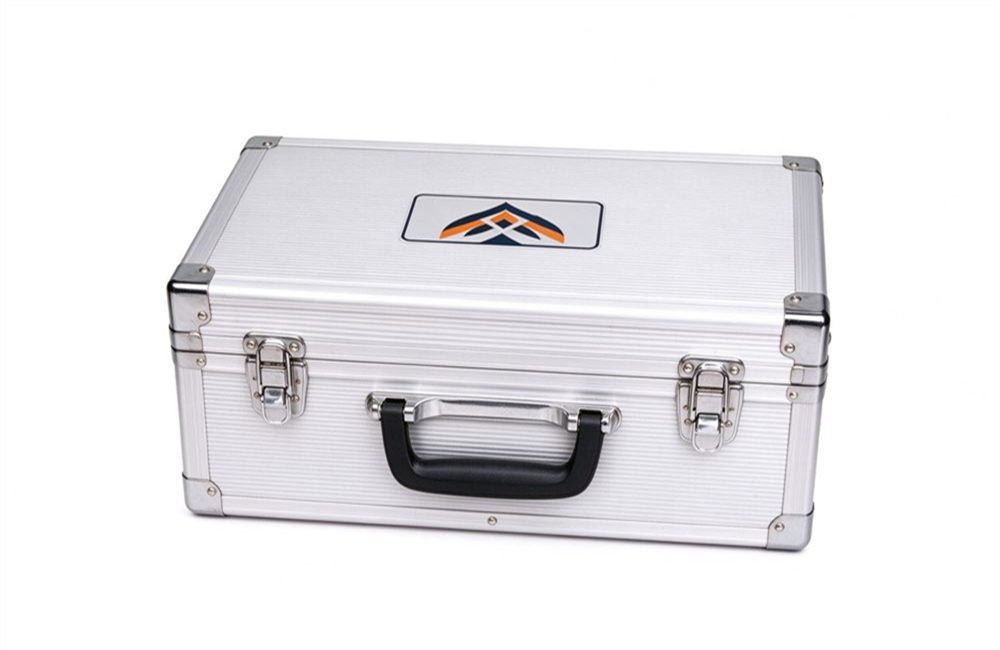
You also get a structural steel carabiner with auto-lock. A pair of anti-slip work gloves. A silver aluminum carrying case with foam insert. An instruction manual with installation diagrams.
|
# |
Item |
Qty |
|
1 |
Descender unit (with brake mechanism) |
1 |
|
2 |
Aircraft steel cable (pre-spooled) |
1 (15/30/50 m) |
|
3 |
Orange safety belt |
1 |
|
4 |
Triangular galvanized mounting bracket |
2 |
|
5 |
Expansion bolts |
6 |
|
6 |
Structural steel auto-lock carabiner |
1 |
|
7 |
Anti-slip gloves |
1 pair |
|
8 |
Aluminum carrying case with foam |
1 |
|
9 |
Instruction manual |
1 |
The aluminum case keeps everything organized. It sits in a closet or under a bed. In an emergency, you grab the case, open it, and take the unit to the window.
All specifications are subject to final contract. We provide a detailed spec sheet with every quotation. Custom lengths and configurations are available on request.
What these numbers mean in practice
These numbers tell you what the escape descent device can do. The 4.35 mm cable diameter may sound thin. Aircraft steel wire is built for high load capacity under tension. The nylon jacket protects your hands and the wire from abrasion.
The cable and belt are tested under controlled conditions to ensure safety during real evacuation.
At 0.16 to 1.5 m/s, a 30-meter descent takes about 20 to 30 seconds. That is fast enough to escape a spreading fire. It is slow enough to land safely without injury.
The long service life means you buy the device once. It stays on the wall through fire drills, building renovations, and daily life. You do not need to replace it every year like a fire extinguisher.
Weight and portability
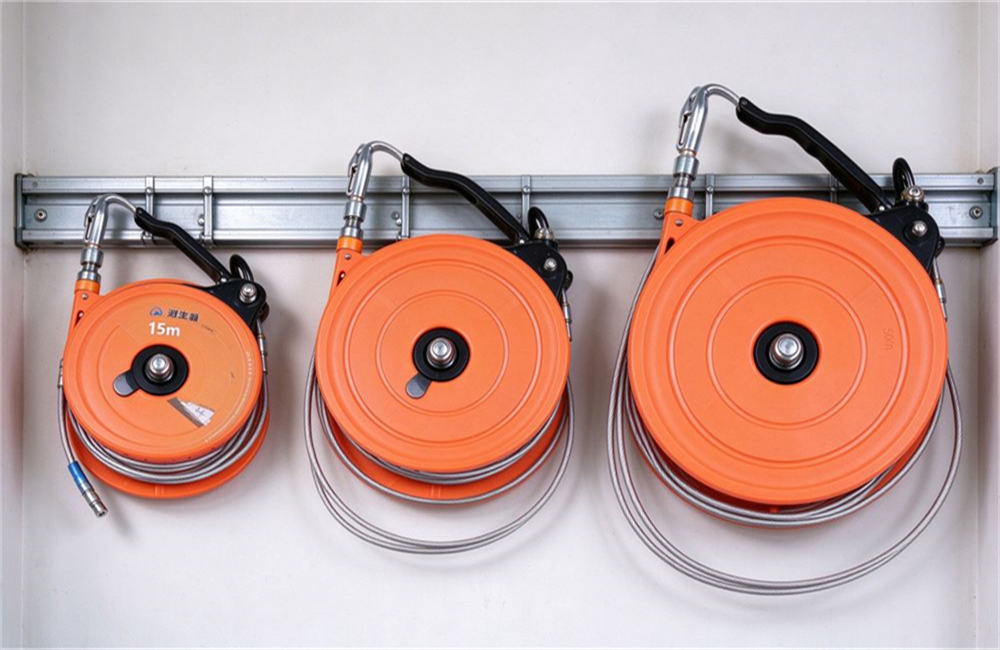
The whole escape descent device weighs under 8 kilograms. The 15 m model weighs about 3.5 kg. The 30 m model weighs about 4.5 kg. The 50 m model weighs about 6 kg. The aluminum case adds about 2 kg.
This means one person can carry the kit from storage to the window. You do not need a team to move it. You do not need tools to deploy it.
The triangular brackets stay on the wall. The unit clips on and off the brackets. In an emergency, you do not install anything. You just hang the pre-tested unit on the existing brackets.
Built for Safe Multi-Person Descent
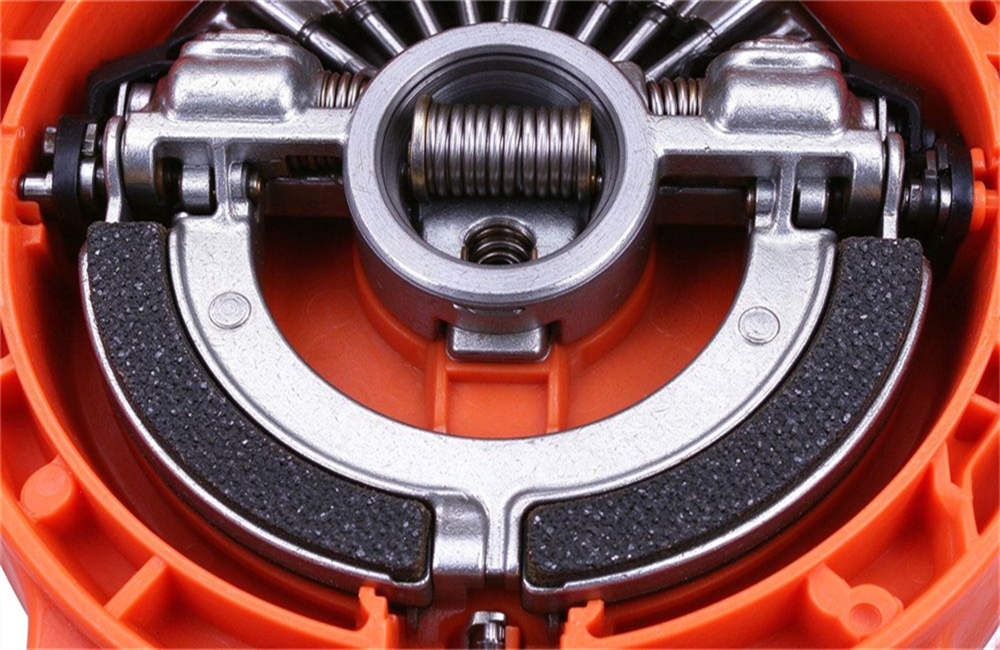
The centrifugal brake is the heart of this system. It is what makes the device safe. It is what makes it different from a simple rope.
How the auto-speed brake works
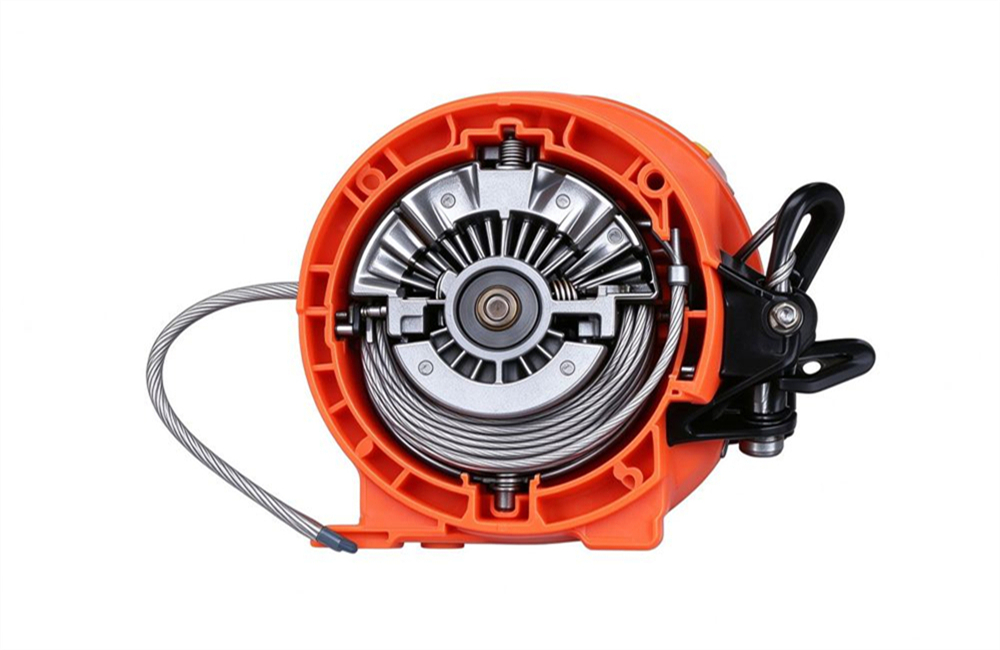
The brake inside the escape descent device limits speed automatically. Inside the durable housing, a spool holds the steel cable. As the cable pulls out during a descent, the spool spins. Inside the spool, weighted arms fly outward from centrifugal force.
These weighted arms press friction pads against the inner wall. The friction resists the spool. The more weight on the cable, the harder the pads press. This automatically limits the descent speed.
A 30 kg child descends more slowly. The brake exerts less force because the spool spins slower. A 100 kg adult descends a bit faster. The brake exerts more force to prevent dangerous acceleration.
The result is a smooth, controlled descent for everyone. No one is flying down. No one is crawling down. The speed stays within a safe range for every body type.
This is the key safety advantage over a basic escape rope. With a rope, your hands are the brake. If you panic, if your hands are sweaty, if you lose concentration, you slide too fast.
With the descender, you do not use your hands as a brake. The mechanical system handles it. You hold the cable gently for stability. You do not grip it to slow down.
After you reach the ground, the cable rewinds automatically. You unclip the harness. The next person clips on. There is no re-spooling. No reset. No tools needed.
The belt and connection system
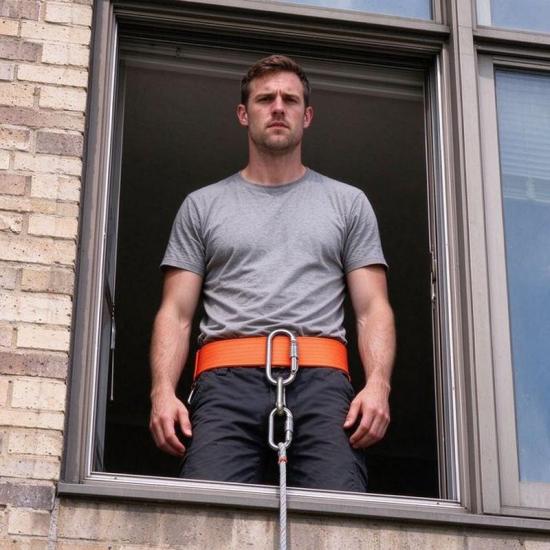
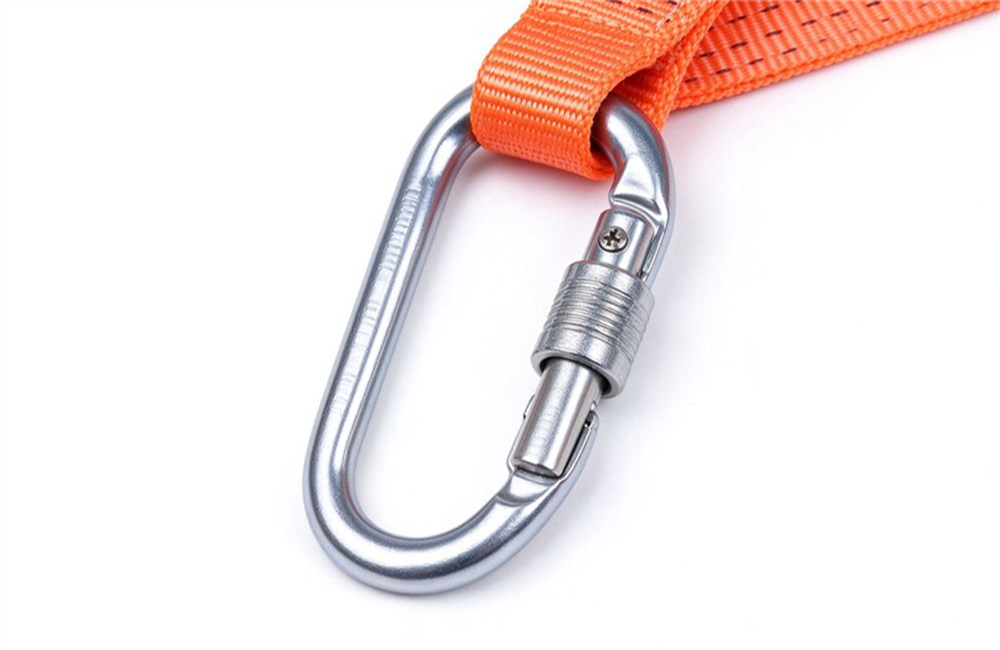
The belt clips to the escape descent device with a locking carabiner. The safety belt wraps around your waist and clips to the cable. It keeps you securely attached during the descent.
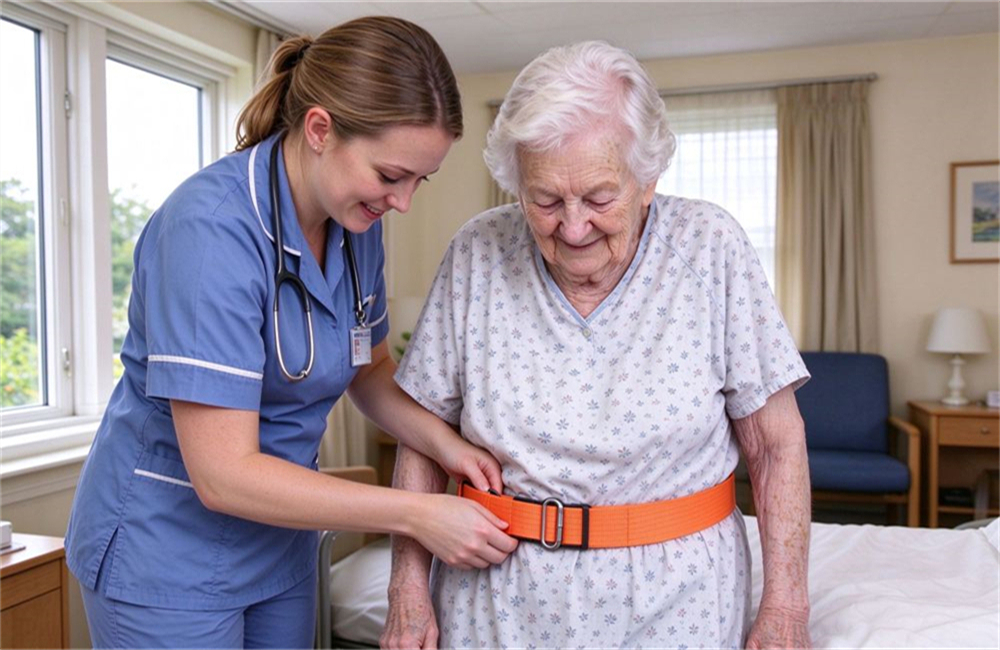
The orange polyester webbing is strong and visible. It fastens around the waist with a steel D-ring at the front.
The structural steel carabiner clips between the D-ring and the cable end. It has an auto-lock gate. It cannot pop open accidentally. The harder you pull, the more securely it locks.
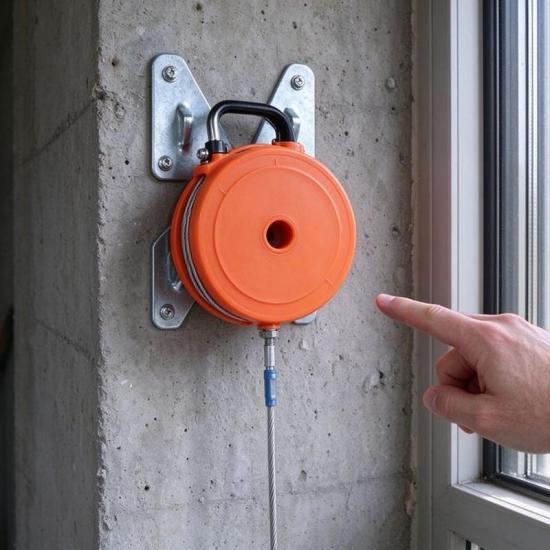
The two triangular mounting brackets bolt to the wall. Each bracket uses three expansion bolts. They must anchor into concrete or solid brick. Glass walls and drywall cannot support this load.
Why a simple waist belt, not a full-body harness?
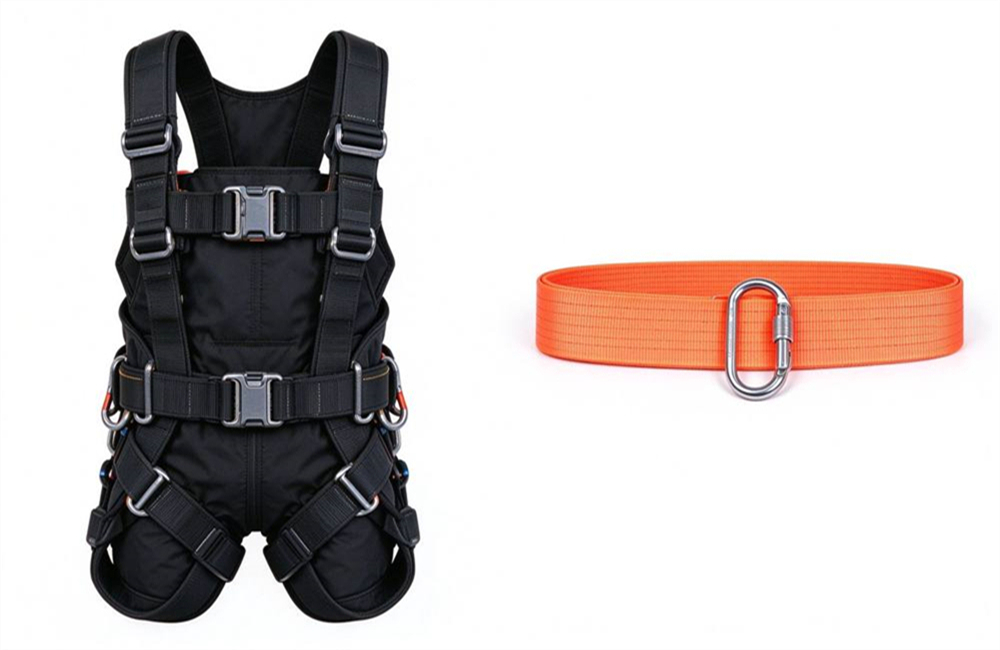
You may be wondering: construction workers wear full-body harnesses with shoulder straps and leg loops. Why does this escape device use just a waist belt?
Good question. The answer comes down to the situation. A full-body harness is designed for workers who hang suspended for hours on a construction site. It distributes weight across the shoulders, chest, and legs.
But in a fire escape, you are not hanging for hours. You are descending for 20 to 30 seconds. The belt supports your weight vertically. The D-ring at the front takes the load straight down.
More importantly, speed matters. A full-body harness takes 60 seconds to put on. You step into leg loops, pull straps over your head, clip chest buckles, and adjust everything. In a fire, you may not have that minute.
A waist belt takes 3 seconds. Wrap it around your waist. Click the buckle. Done. You are ready to step out the window.
Our belt is tested to 6.5 times the maximum load per GB21976.2-2012. It is not a weak strap. It is a purpose-built escape belt designed for fast, short descents in an emergency.
Built for years of standby
This escape descent device sits on standby for years without service. The durable housing resists rust and corrosion. The galvanized steel brackets resist moisture. The nylon cable jacket resists UV damage and aging.
The service life is long when stored indoors. You do not need to charge it. You do not need to replace batteries. You do not need an annual service contract.
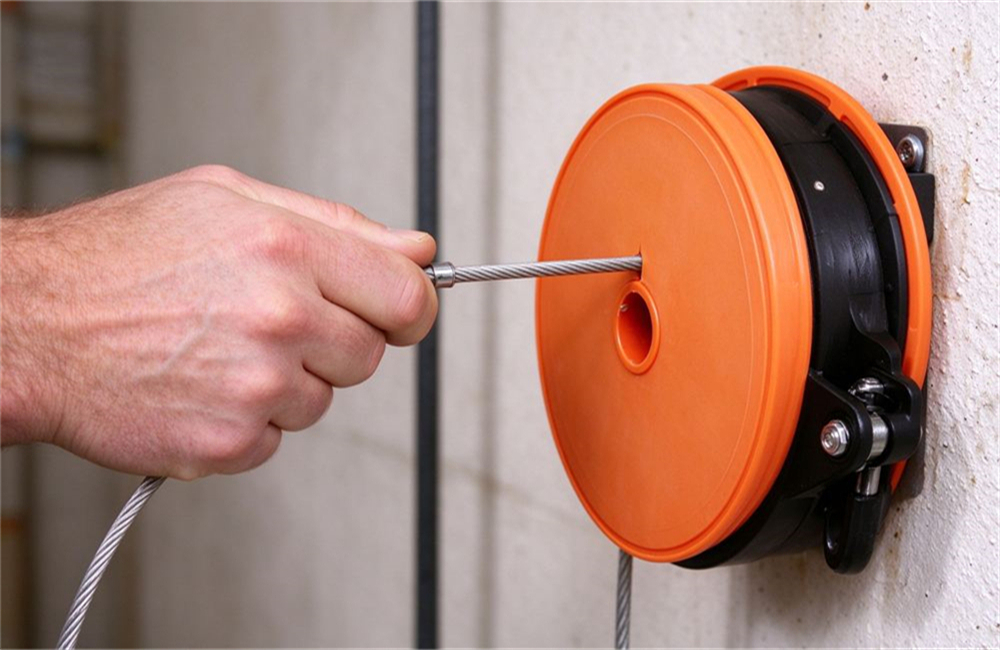
Once a year, we recommend a quick visual check. Look at the cable for fraying or broken wires. Look at the safety belt webbing for cuts or wear. Pull the cable to make sure the brake engages smoothly.
If the cable is frayed, replace the cable. If the webbing is cut, replace the belt. If the brake feels stiff or loose, contact us. These simple checks take five minutes.
Our units are tested to GB21976.2-2012 fire escape standards. Testing covers static load, dynamic drop, cable tensile strength, and harness strength. Test reports are available on request.
What happens if power fails
The escape descent device is fully mechanical and needs no power. One of the main benefits is that no power is needed. The brake is mechanical. The cable pays out by gravity. The rewind is spring-assisted.
During a fire, the building power grid may fail. Elevators stop. Lights go out. Alarm systems may fail. But the descent device does not care. It works the same in a blackout as it does on a sunny day.
This is why fire safety experts recommend mechanical systems over electronic ones. If the power fails, the electronic device becomes a dead box. The mechanical device keeps working.
What you feel during a descent
Users of the escape descent device report a smooth steady ride. When you step out the window, you feel a brief moment of weightlessness. Then the cable pulls tight. The brake engages immediately. You feel a smooth, steady pull downward.
You do not feel a jerk. You do not feel a drop. The speed is constant from the first meter to the last. It feels like being gently lowered by a machine.
Your hands hold the cable loosely. You can let go. The harness supports your weight. You can look down and see the ground approaching.
For a 30 m descent, the trip takes about 20 to 30 seconds. You land on your feet. The cable rewinds automatically after you unclip.
What can go wrong
The most common issue is not the device itself. It is the installation. If the brackets are bolted to drywall instead of concrete, they can pull out. That is why we emphasize concrete or solid brick.
The second issue is a blocked descent path. If the cable hangs on a balcony railing or a power line, the person may stop mid-descent. That is why the window path must be checked before installation.
The third issue is aging. After long-term use, the cable jacket may become brittle. The safety belt webbing may lose elasticity. That is why annual visual checks matter. Replace worn parts before they are needed.
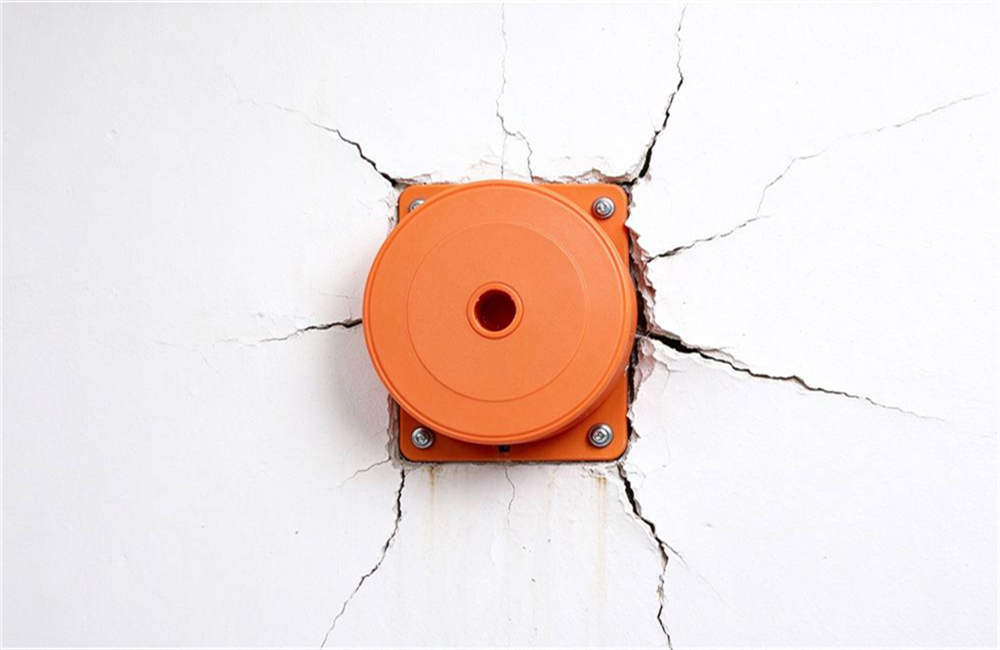
How to use it in 5 steps
Five steps are all it takes with this escape descent device. The unit stays mounted on the wall brackets permanently. You do not need to hang it up each time. In an emergency, you go through these steps:
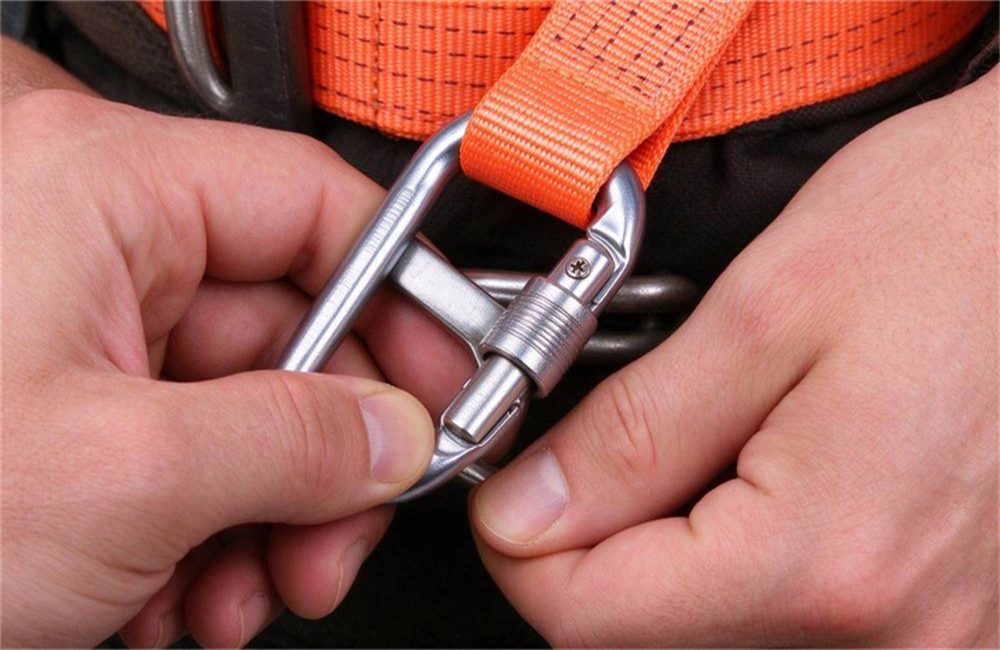
Step 1: Take the harness from the aluminum case. The case sits nearby on a shelf or in a closet. Open it. Take out the orange safety belt.
Step 2: Put on the belt. Wrap the orange belt around your waist. Fasten the buckle. Adjust it so it sits snug but not tight. The D-ring faces forward.
Step 3: Clip the carabiner. Connect the auto-lock carabiner from your chest D-ring to the cable end. You will hear a click. Pull to confirm it is locked.
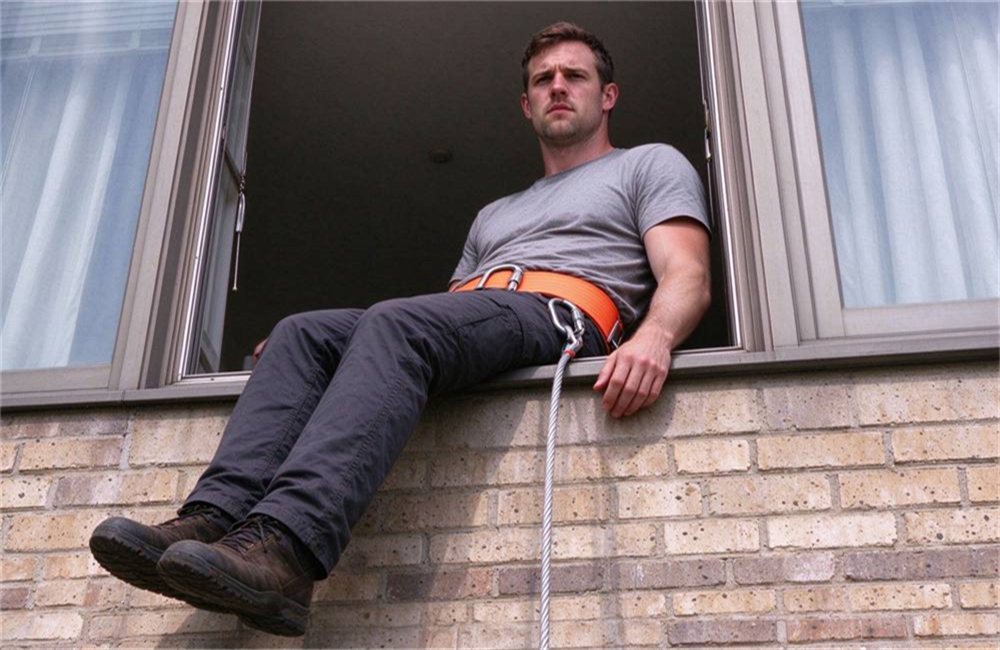
Step 4: Step out the window. Sit on the window sill. Lean back. Let your weight hang on the harness. The brake engages automatically. The cable starts paying out.
Step 5: Land and unclip. You feel your feet touch the ground. Unclip the carabiner. The cable rewinds automatically. The next person puts on the harness and clips on.
The whole process takes about 60 seconds per person. No training. No practice. The instructions are printed on the inside of the case lid.
Where Rescue Descenders Are Installed
The best escape descent device installation location is a window that faces open ground. This evacuation descender must be mounted where the descent path is clear below.
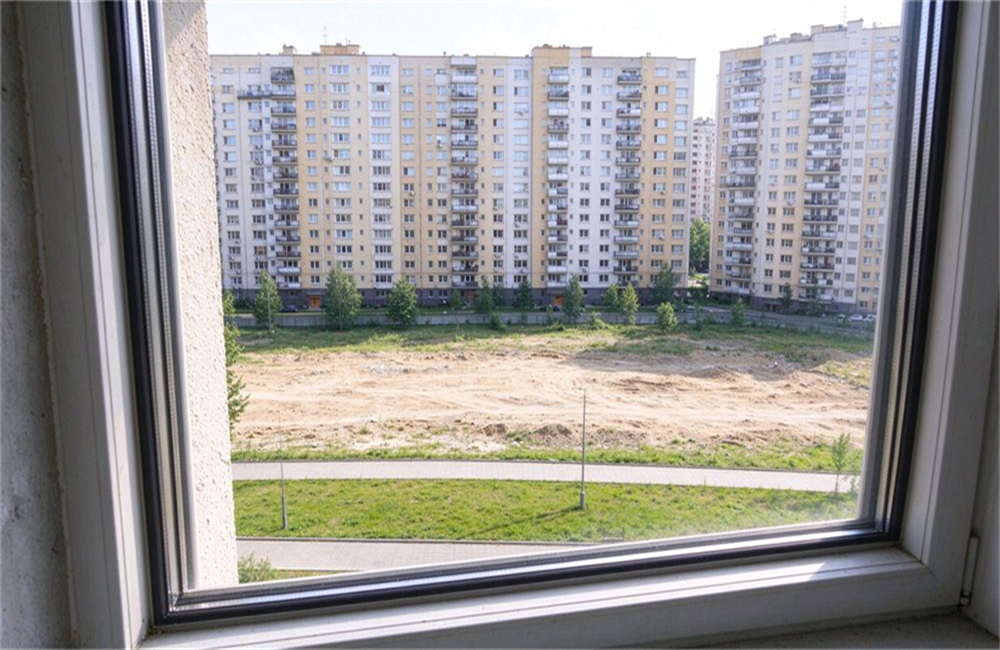
High-rise residential buildings
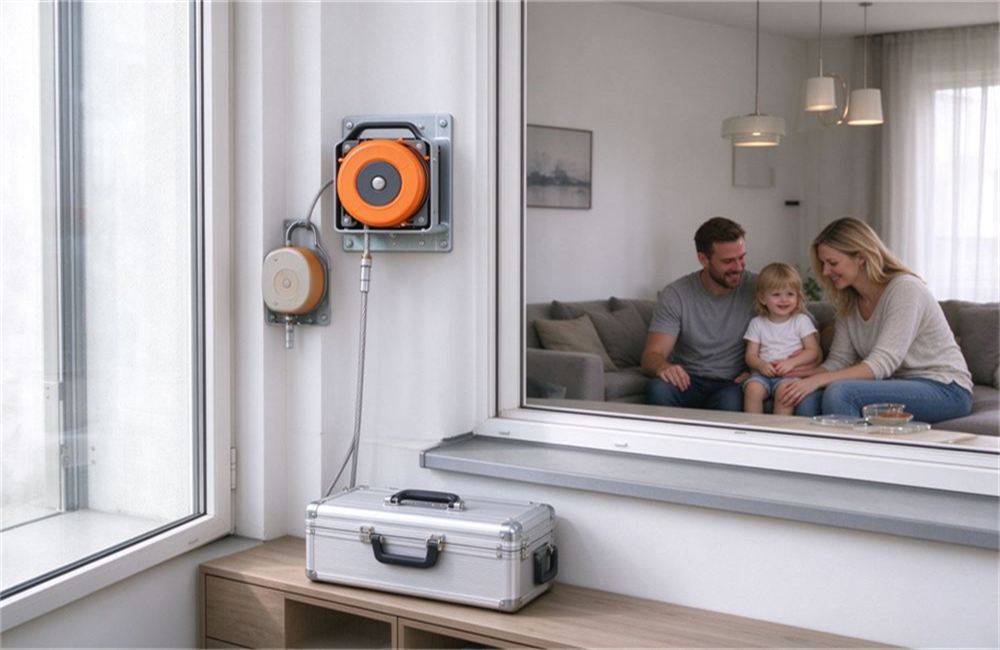
Residential towers install the escape descent device on upper floors. In a residential high-rise, the stairwell is the primary escape route. But if the stairwell fills with smoke, it becomes unusable. A window descent device gives residents a second way out.
We recommend one unit per apartment. For larger homes, install two units. One in the master bedroom. One in the living room. This gives options if one window route is blocked.
Choose the window carefully. It must face open ground or a courtyard. It must not face power lines. It must not face a neighboring building's balcony. It must not face a glass atrium below.
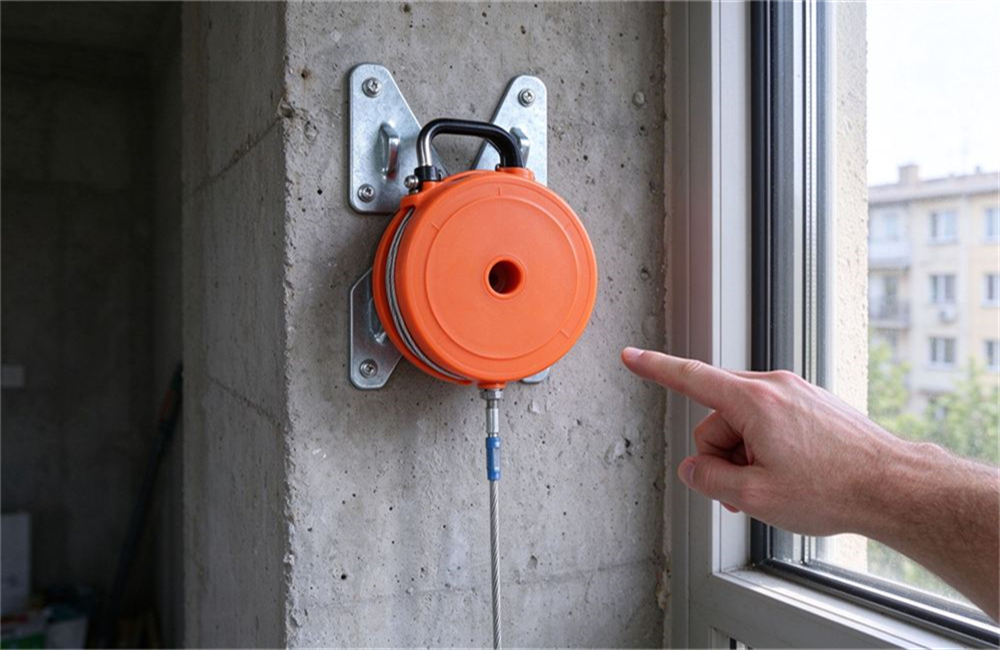
The brackets mount to the wall beside the window. The unit hangs on the brackets. The cable runs out the window and down. The harness stays in the aluminum case nearby.
Offices, hotels, and public buildings
Hotels place the escape descent device near every exit window. In office buildings, install units in public corridor landings. Two to four units per floor. The property management team trains staff during fire drills.
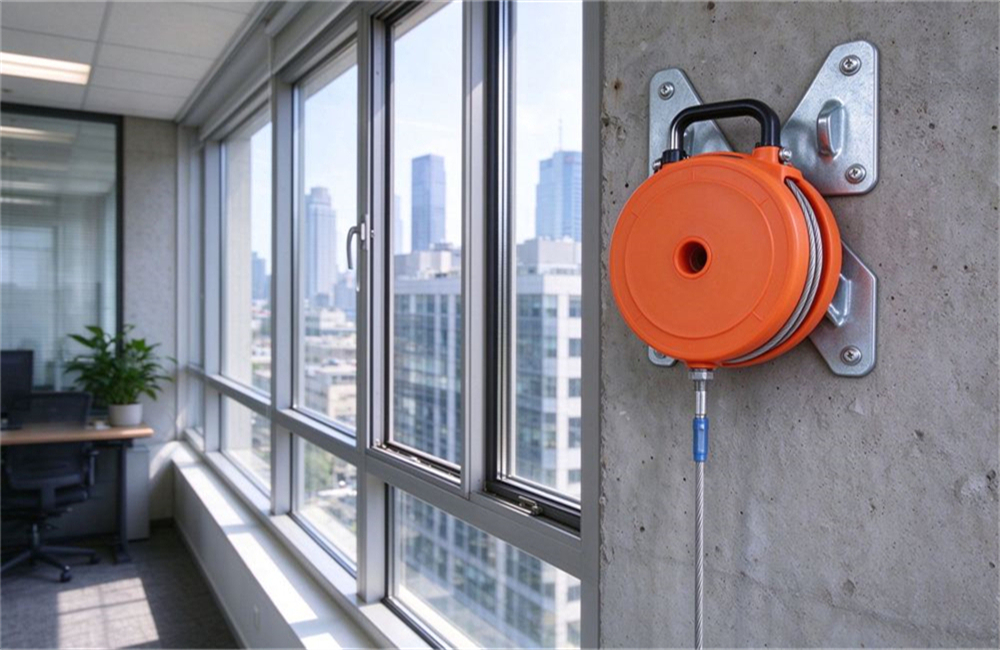
Hotels do not install units in every guest room. Instead, they keep descender kits in stairwell landings. Hotel staff guide guests to the windows during an evacuation.
Hospitals and nursing homes have special needs. Patients and elderly residents move more slowly. The automatic speed control is essential. A hand-operated rope is not safe for someone with limited strength.
Schools should install units in upper-floor classrooms. Children are lighter. The brake automatically adjusts to their lower weight. Teachers can guide students through the descent.
Typical installation steps
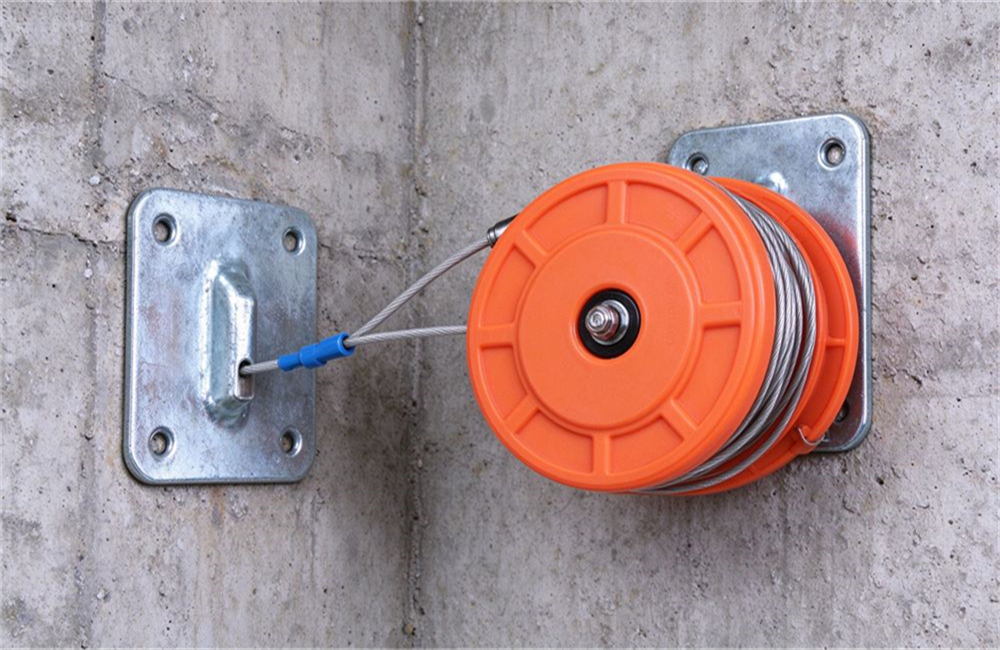
Installation of the escape descent device takes under one hour. Step one. Locate a concrete or solid brick wall beside the window. Step two. Drill holes at the marked positions. Step three. Insert the six expansion bolts.
Step four. Bolt on the two triangular steel brackets. Step five. Hang the descender unit on the brackets. Step six. Pull the cable fully out and let it rewind to test the brake.
The brackets stay on the wall permanently. You do not remove them after testing. The descender unit and harness live in the aluminum case. In an emergency, open the case, clip the harness to the cable, and go.
We recommend one fire drill per year. Everyone in the building should know where the unit is. They should know how to put on the harness. They should know which window to use.
Industrial and maritime installations
Industrial sites use the escape descent device on high platforms. Factories with tall production floors can install units in upper-floor offices. Workers can evacuate through high windows if the stairwell fills with smoke.
Ships and offshore platforms use similar descent systems. The bracketed unit mounts near a hull opening. Crew members can descend to a rescue boat or life raft.
Construction sites use temporary versions on tall structures. When the site has no permanent stairs, a portable descender provides a safe way down.
What to check before installation
Check the wall before mounting the escape descent device. Measure the floor height. Most residential floors are about 2.8 to 3.0 meters. Count the floors from the window to the ground. Add 5 meters for safety margin. Choose a cable length that covers that distance.
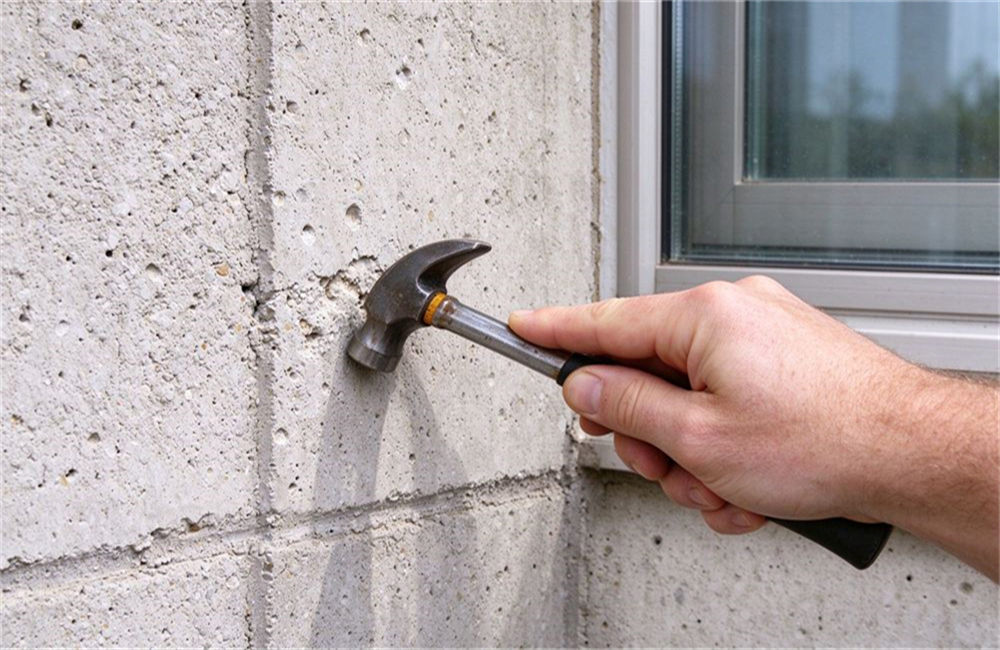
Check the wall type. Tap the wall with a hammer. Solid concrete sounds dull. Hollow brick sounds hollow. Drywall sounds papery. Only concrete and solid brick can hold the brackets.
Check the window below. Look down from the window. Is there a sidewalk? A driveway? A grassy area? The landing zone should be flat and clear. Avoid landing on a roof, a car, or a glass atrium.
Check for overhead obstacles. Are there power lines within 3 meters? Are there neighboring balconies? Are there tree branches? The cable must hang straight down without touching anything.
Descender vs Escape Rope vs Escape Ladder
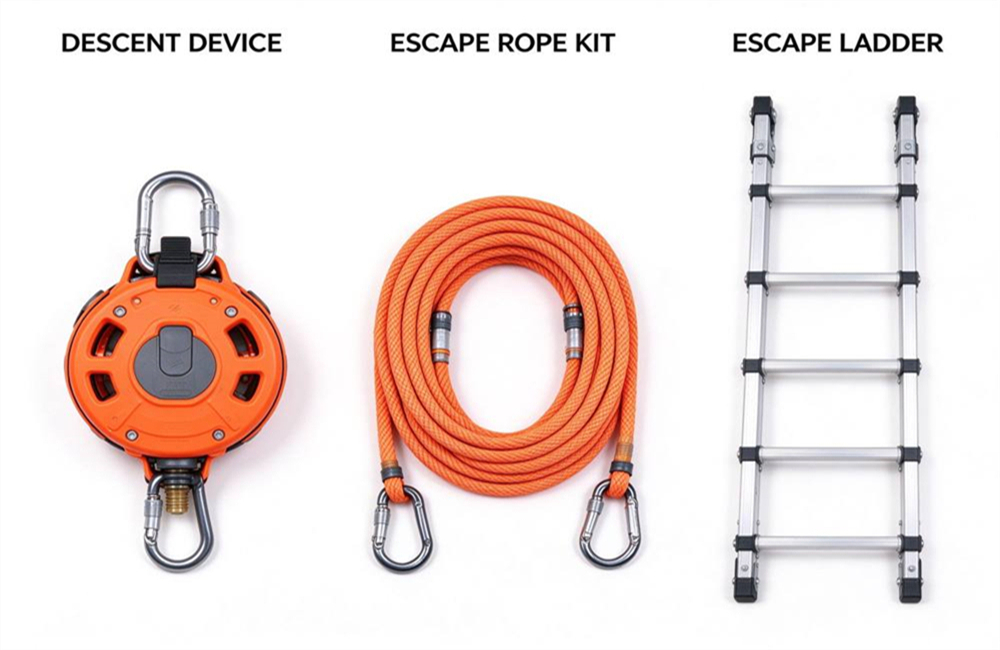
There are three main types of high-rise escape equipment. Each has its place. Each fits a different building and user.
Three ways out of a high-rise fire
Compare the escape descent device with ropes and ladders. An escape rope kit is the most affordable. It usually comes with a rope, a few hooks, and sometimes a simple descender ring. You control the rope speed with your gloved hands.
An escape ladder hangs outside the window. It has metal rungs. You climb down rung by rung. It works well when the building is not very tall.
A escape descent device is a more complete system. It has the automatic brake. It has the safety belt. It serves multiple people in sequence. It costs more, but it is safer for high floors.
Feature
Rescue Descender
Escape Rope Kit
Escape Ladder
Auto speed control
Yes (centrifugal brake)
No (hand-controlled)
No (climbing)
Multi-person use
Yes (auto-rewind)
No (one kit per person)
No (one at a time)
Best floor range
10+ floors
5–15 floors
3–6 floors
Elderly & children
Suitable
Needs training
Needs strength
Ease of use
High (clip and go)
Medium (needs practice)
Low (just climb)
Annual maintenance
Visual check
Rope & hook inspection
Connection check
Shelf life
Long service life
—
—
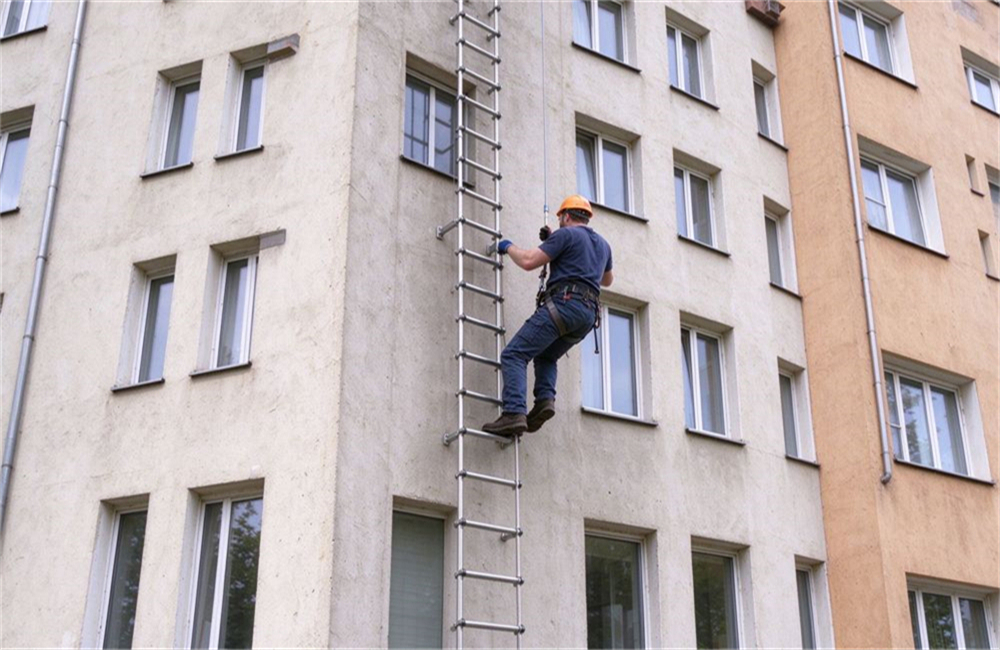
Which is safest?
For most users the escape descent device is the safest option. The descent device has a built-in mechanical brake. You cannot fall too fast, no matter your weight. The harness supports your whole body.
A rope kit relies on your hands. If you grip too loosely, you slide fast. If you grip too tightly, your hands burn through the gloves. It requires training and physical strength.
A ladder relies on your grip strength and leg strength. If your hands are sweaty from smoke or fear, you may slip. If your legs are tired, you may not climb all the way down.
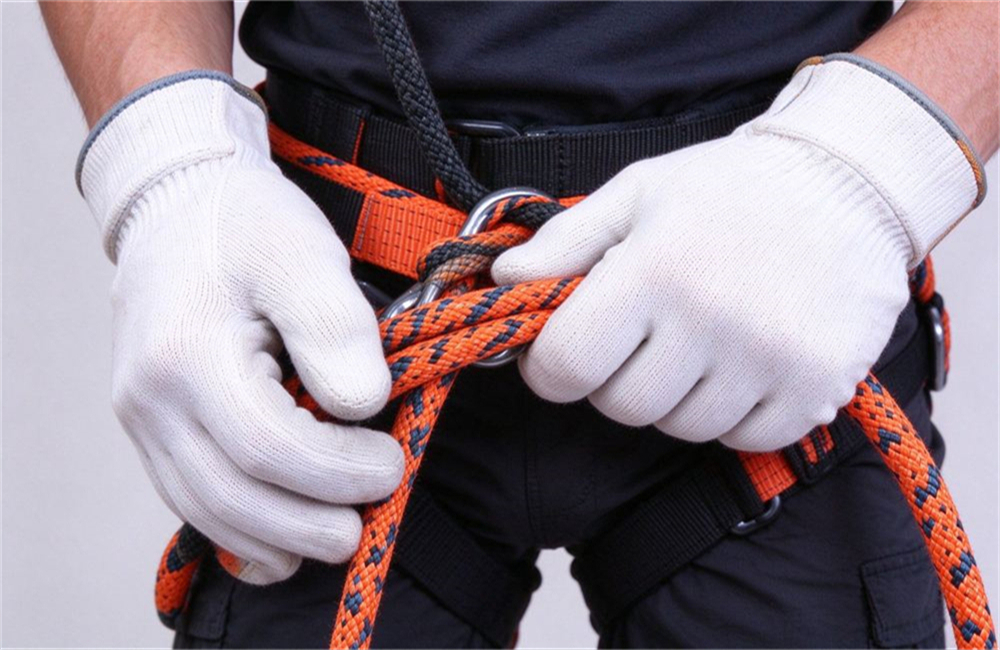
Who can use each option?
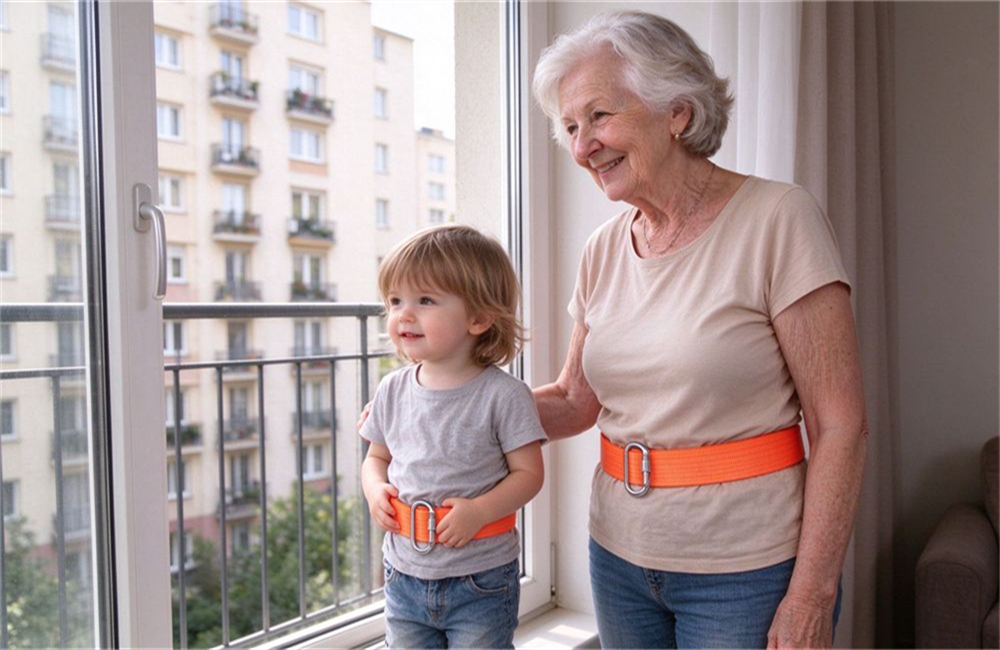
The descent device works for elderly people. It works for children as light as 30 kg. It works for people with no climbing experience. It requires no physical strength to operate.
A rope kit works best for physically fit adults. People who have practiced using it. People who can control their grip under stress.
A ladder works best for people who can climb. Children in good shape. Adults with no mobility issues. It is not ideal for someone with bad knees or weak arms.
Which one should you buy?
Buy the escape descent device that fits your floor height. If you live above the 10th floor, choose the descent device. The automatic brake and multi-person capability are worth the investment.
If you live on floors 5 to 9 and have a limited budget, a rope kit is a reasonable alternative. Make sure everyone in the household practices with it.
If you live on floors 3 to 6, an escape ladder is the simplest and cheapest option. It hangs outside the window and you climb down.
Many building owners choose a combination. Install descent devices in public corridors for the main evacuation. Provide rope kits in individual apartments as a backup. This balances safety across the whole building.
Cost and maintenance comparison
Over ten years the escape descent device costs less than rope kits. A descent device has a higher upfront cost than a rope kit. But it lasts for years. It serves multiple people. It requires almost no maintenance.
A rope kit is cheaper to buy. But each person needs their own kit. The rope needs inspection every year. The carabiner may wear out. Over years of use, the total cost can add up.
An escape ladder is the cheapest option. But it only works for low floors. It takes up window storage space. It is hard to use for anyone with limited mobility.
Parameter
Our Descender
Industry Standard
Cable diameter
4.35 mm aircraft steel
~3.0–3.5 mm
Cable breaking strength
Tested to GB standard
—
Harness breaking strength
Tested to GB standard
—
Shelf life
Long service life
—
Mounting brackets
2 galvanized steel plates
1 thin steel plate
Carabiner
Structural steel auto-lock
Standard snap hook
Packaging
Aluminum carrying case
Plastic bag or box
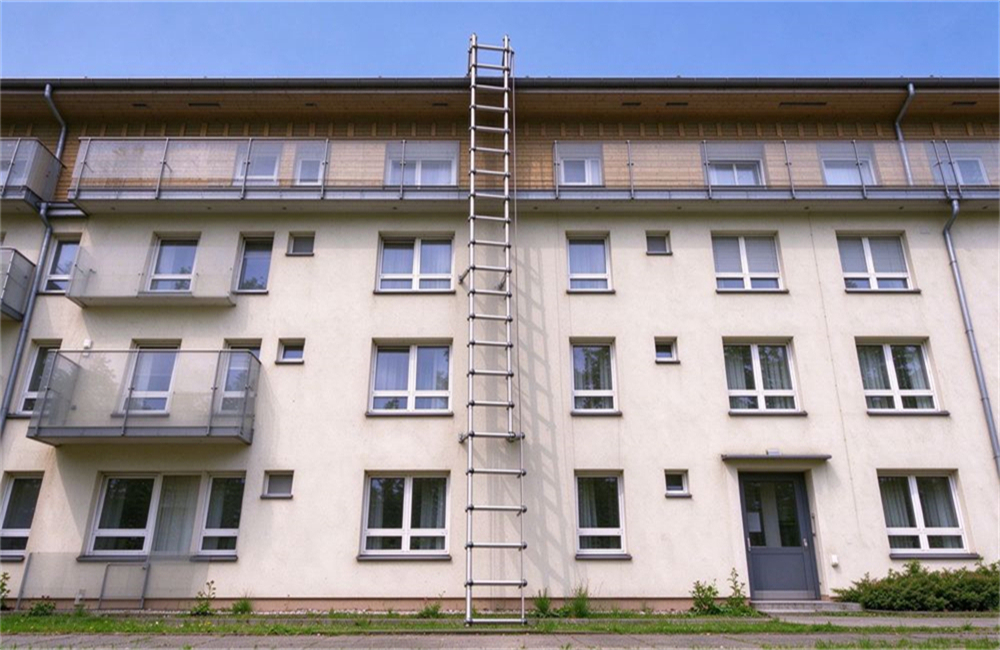
Training requirements
Training for the escape descent device takes under 15 minutes. The escape descent device needs minimal training. Show someone how to put on the harness. Show them how to clip the carabiner. Show them which window to use. That is enough.
A rope kit needs more practice. Users need to learn how to grip the rope. They need to learn how to feed it through their gloves. They need to practice under supervision.
A ladder needs the least training. You just climb. But climbing itself is the hard part. Not everyone can do it when scared.
Real-world
Real rescues use the escape descent device from balconies and roofs.
Scenario 1: A family of four on the 12th floor. The parents are fit. The grandmother is 72 with bad knees. The child is 8 years old. A rope kit would be too hard for grandma and the child. A ladder is too high for the 12th floor. The escape descent device is the only option that works for everyone.
Scenario 2: A 20-story office building with 200 people per floor. Two descent devices in the corridor landing can evacuate a floor in about 20 to 30 minutes. Rope kits would require 200 individual kits and hours of training. A ladder is impossible at 20 floors.
Scenario 3: A 5-story walk-up apartment. A rope kit at $10 to $15 per household is affordable. An escape ladder hanging outside the window works for low floors. The descent device at a higher cost is overkill for 5 floors.
Scenario 4: A nursing home on the 6th floor. Residents cannot climb a ladder. They cannot control a rope in a panic. The automatic descent device lets staff lower each resident safely. The harness supports someone who may not be able to stand on their own.
How to Choose the Right Descender Model
Choosing the right model starts with your building height. It then depends on who will use it and where it will mount.
Start with the floor count. If your building has 5 floors or below, the 15 m model may be enough. You may even consider an escape ladder for low floors.
If your building has 6 to 10 floors, the 30 m standard model is the right choice. This is the most common configuration. It covers most residential towers.
If your building has 11 or more floors, go with the 50 m model. The longer cable ensures you reach the ground. The reinforced brake handles the longer descent.
Next, think about who will use the equipment. If only fit adults live or work there, a basic rope kit may cut costs. If elderly people, children, or people with mobility issues are involved, the automatic descender is worth the investment.
For fire departments, industrial facilities, or tall towers, consider our professional-grade model. It is built for more repeated use. It uses heavier-duty materials.
Key points to confirm before ordering
Confirm wall type before ordering this escape descent device. First, check your wall structure. Is it concrete or solid brick? Glass curtain walls and lightweight drywall cannot support the mounting brackets. You may need a special anchor plate.
Second, check the window descent path. Is the ground directly below clear? Are there power lines? Are there neighboring balconies? Is there a glass atrium? The path must be completely clear.
Third, think about cable length. Standard lengths are 15 m, 30 m, and 50 m. Custom lengths from 10 m to 100 m are available. Lead times for custom lengths depend on contract terms.
Fourth, think about packaging and branding. We can print your logo on the aluminum case. We can change the harness color. We can provide multilingual instruction manuals. MOQ depends on the level of customization.
If you are unsure which model fits your building, contact us. Tell us the floor count, the wall type, and who will use it. We will recommend the right configuration. We will provide a spec sheet and a quotation.
Who should NOT buy this device
Skip this escape descent device if you only need one-time use. Be honest with yourself. This device is not right for every situation.
If you live on the 3rd floor or below, a simple fire escape ladder is cheaper and easier. You do not need a mechanical brake for a 9-meter drop.
If your budget is under $20 per household, a basic escape rope kit gives you more units for the same money. The rope kit requires practice, but it works.
If your wall is glass curtain wall or thin drywall, you cannot install the brackets safely. Talk to us about alternative mounting before you order.
If you only need one device for a single staircase that works, the stairwell itself is your best escape route. This device is a backup for when the stairwell fails.
Common Concerns Before You Buy
We hear the same escape descent device questions from buyers every week. Here are direct answers.
Do I need to drill holes in my wall?
The escape descent device mounts with four anchor bolts. Yes. The two triangular brackets need six expansion bolts into concrete or solid brick. This is permanent installation. The brackets stay on the wall. The unit clips on and off. If you rent an apartment, talk to your landlord first.
Can I use it with sliding windows or casement windows?
Yes. The device mounts on the wall beside the window, not on the window itself. The cable goes out through the open window. Sliding windows open enough for the cable. Casement windows open outward. Both work.
Can one person use it alone?
One person can operate the escape descent device alone. Yes. You put on the harness, clip the carabiner, and step out. You do not need a second person to hold the rope or operate the brake. The mechanical system handles everything. But we recommend having someone nearby in case you need help with the harness.
What if the device falls off the wall?
A properly mounted escape descent device will not come loose. The six expansion bolts anchor into concrete. The brackets are tested per national standards. A 100 kg person is well within the rated load. The brackets will not pull out if installed correctly.
Does it work in winter or in extreme heat?
The escape descent device works from minus 20 to plus 50 degrees. Yes. The unit is designed for indoor wall mounting in normal building conditions. It is designed for indoor wall mounting, so it is not exposed to rain or snow.
Do I need to train my residents or staff?
Basic training takes 5 minutes. Show them where the case is. Show them how to put on the harness. Show them which window to use. The instructions are printed inside the case lid. An annual fire drill reinforces the process.
What if I have more questions?
Send us an email. We reply within one business day. We can send a spec sheet, arrange a sample, or do a video call to walk through installation.
Rescue Descender FAQ
How fast does an escape descent device lower you?
The speed is fully automatic. It ranges roughly from 0.16 to 1.50 meters per second. Lighter users descend more slowly. Heavier users descend faster but never exceed the safe maximum. You do not control the speed with your hands. The centrifugal brake handles everything.
Can one escape descender be used by multiple people?
Yes. That is the core advantage of the reciprocating design. After one person reaches the ground, the cable rewinds automatically. The next person clips on and descends. One unit can be used by everyone in a household or on a floor. No re-spooling or reset is needed between users.
What floor height does a 30 m descender cover?
A 30 m unit covers approximately 10 floors, assuming about 3 meters per floor. Choose the 15 m model for buildings up to 5 floors. Choose the 50 m model for buildings from 11 to 17 floors. If you are between sizes, choose the longer model for safety margin.
Do I need electricity to operate a rescue descender?
No. The brake is purely mechanical. It works without batteries, power cords, or electronics. This is critical during a fire when building power may be cut. The device will work as long as the wall brackets are secure.
Is a escape descent device safe for elderly people and children?
Yes. The automatic speed control means no hand braking is needed. The safety belt secures around the waist. Children as light as 30 kg can use it safely. Elderly people do not need hand strength to operate it. It is safer than a hand-operated rope for people with limited mobility.
How do you install a escape descent device at home?
Use the two triangular steel mounting brackets. Bolt them to a concrete or brick wall beside the window using the six expansion bolts. Hang the descender unit on the brackets. The brackets stay mounted permanently. The harness and case stay stored nearby for quick access.
What is the difference between a descender and an escape rope kit?
A descender has an automatic centrifugal brake and serves multiple people. A rope kit has no built-in brake and each person needs their own set. A descender costs more but is safer for high floors and for non-trained users. A rope kit is cheaper but requires physical strength and practice.
How long does a escape descent device last?
The service life is long when stored indoors. The steel cable and durable housing resist corrosion and UV damage. Annual visual checks are recommended. If the cable shows fraying or the webbing shows cuts, replace those parts.
Can I customize the cable length and packaging?
Yes. We offer 15 m, 30 m, and 50 m standard lengths. Custom lengths from 10 m to 100 m are available. We can print your logo on the aluminum case. We can change harness colors. We can provide multilingual manuals. MOQ depends on the customization level.
What should I check before using a rescue descender?
Check the steel cable for fraying or broken wires. Check the orange safety belt webbing for cuts or wear. Check that the brake engages smoothly when you pull the cable. Check that the wall brackets and bolts are tight. Do not use the unit if the cable is damaged.
Is a escape descent device better than a fire escape ladder?
Above the 10th floor, yes. The automatic brake and multi-person capability make the descender safer for high-rise evacuation. Below the 6th floor, a ladder may be cheaper and simpler. Choose based on your floor count, who uses it, and your budget.
How many escape descent devices does a building need?
We recommend one unit per 20 to 30 people in public buildings. For residential apartments, one to two units per household. This ensures everyone can evacuate in a reasonable time. For offices, install two to four units per floor in corridor landings.
What testing standards does a rescue descender meet?
Our units are tested to GB21976.2-2012 fire escape standards. Testing covers static load, dynamic drop, cable tensile strength, and harness strength. Test reports are available on request. We do not claim certifications we cannot verify.
How do I order bulk escape descent devices for a project?
Tell us your building height, the number of units needed, any customization requirements, and your destination port. We will reply within one business day with a spec sheet and quotation. MOQ and lead times are confirmed per contract.
Bulk Order and OEM Information
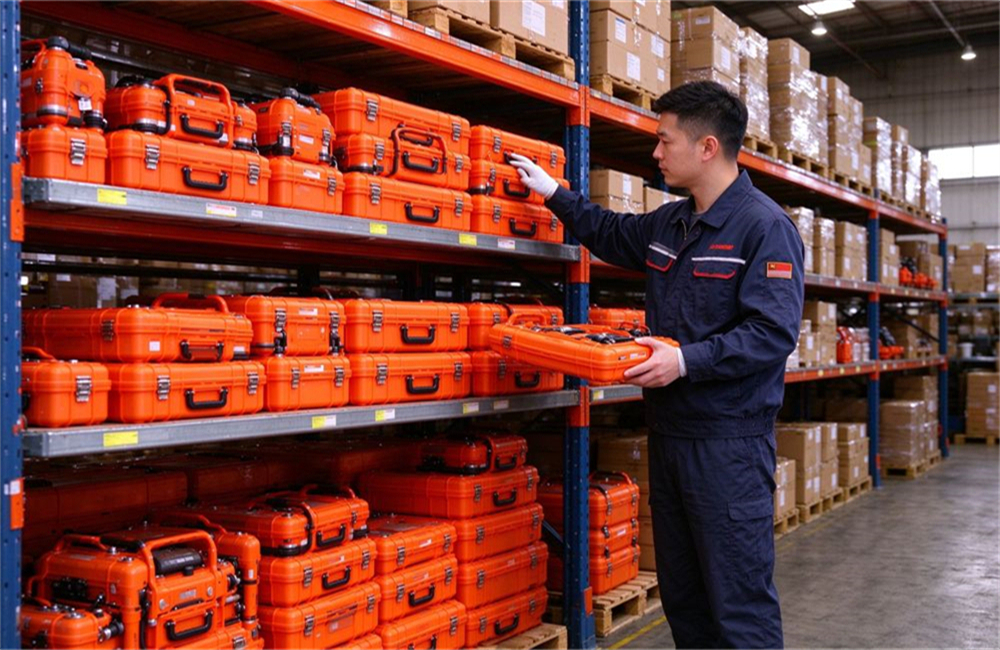
OEM printing is available on the escape descent device housing. We supply this reciprocating escape descender in bulk for residential, commercial, and institutional projects. Standard models ship from stock. Custom configurations are built to order.
We offer three standard cable lengths. We can customize the harness color to match your branding. We can print your logo on the aluminum carrying case. We can provide instruction manuals in multiple languages.
MOQ is flexible for standard models. Custom orders have a separate MOQ requirement. Both are confirmed per contract. We support trial orders before larger commitments.
How to get a quote
Send your floor height to get a quote for this escape descent device. Send us your building height. Tell us how many units you need. Let us know if you need custom packaging or private label. Share your destination port for shipping calculation.
We will reply within one business day. You will receive a detailed spec sheet. You will receive unit pricing. You will receive lead time information. You will receive shipping options.
OEM and private label options
Your logo can be printed on the escape descent device housing. We offer full OEM services. We can put your brand logo on the unit housing. We can package the kit in your custom printed case. We can provide manuals in your local language.
We also offer white-label supply. You buy the units unbranded. You add your own branding after delivery. This works well for distributors and resellers.
Custom harness colors are available. Standard is bright orange. We can produce red, yellow, or black harnesses for orders above MOQ.
Sample and trial order policy
A sample escape descent device ships within one week. We provide sample units for testing. You can test the brake mechanism. You can test the cable strength. You can test the harness fit.
Trial orders start at a low MOQ. This lets you test the market before a full container. Reorder quantities scale up as demand grows.
All pricing, MOQ, and lead times are confirmed per contract. We do not publish fixed prices because shipping and customization vary by project.
Packaging and shipping
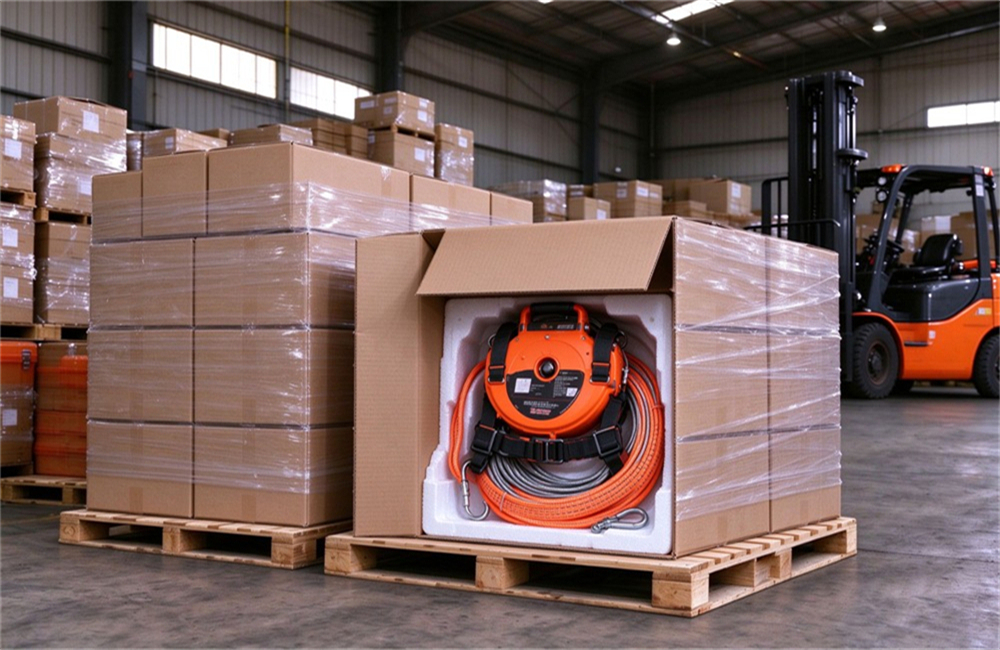
Each escape descent device ships with a foam-lined case. Each unit packs in its own silver aluminum carrying case with foam insert. The case measures approximately 45 x 35 x 15 cm. Gross weight per unit is about 5 to 7 kg depending on cable length.
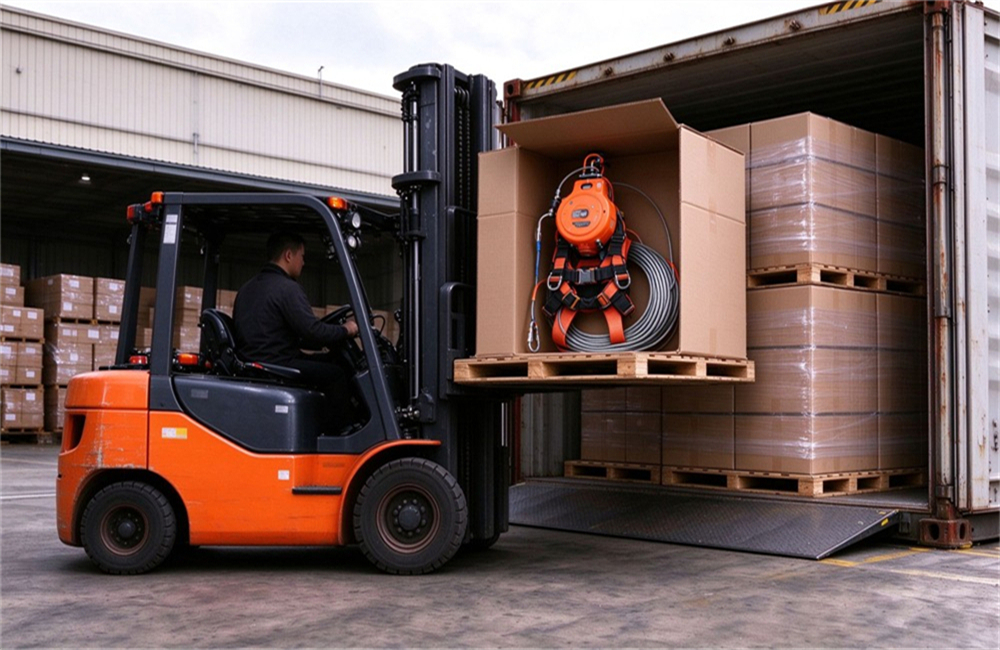
Bulk orders ship in export cartons on pallets. Standard packaging is one aluminum case per carton. We can arrange consolidated pallet shipping by sea or air. Dangerous goods classification depends on the CO2 or gas cylinder options.
Ready to order or need a quote?
What happens next: We reply within 1 business day. You get a spec sheet, unit pricing, and lead time. We can ship a sample for testing before you commit to a bulk order.
Previous :
Self-Locking Escape Rope Kit for High-Rise EmergencyNext :
Escape system & Harness | 10mm Kernmantle EN 361 Wholesaler Multi-function Life Saving Rope, 8-20mm Optional, Earthquake Rescue
This high-strength rescue safety rope is made of premium polypropylene material with a load-bearing capacity up to 2741kg. Multi-channel mechanical seaming ensures firmly secured ends without loosening. High-visibility design in orange, yellow, red, and blue allows quick identification in complex rescue environments. The soft rope design is easy to tie and stays secure, available in multiple specifications from 8mm to 20mm, suitable for various rescue scenarios including earthquakes, floods, and fires, providing over 99% safety assurance for rescue personnel.
 High-Reliability Escape Descender Kit for School Safety
This High-Reliability Escape Descender Kit for School Safety features YL104 die-cast aluminum, weighs only 3.5kg, offers IP65 waterproof rating, and includes high-strength steel cables withstanding 500 tons of pressure. With black body and orange markings, it complies with GB8624-2012 national safety standards, operates at heights of 4-80 meters, maintaining stable descent speed of 0.8-1.2 meters/second. Specifically designed for campus fire emergencies with simplified operation, suitable for school buildings, libraries, and dormitories, providing 98% reliable escape assurance for students and faculty.
 Steel Core Safety Escape Rope, Aviation-Grade, Fire Use
This Steel Core Safety Escape Rope features aviation-grade steel wire core design, 12mm standard diameter, with load capacity up to 500kg. The white body with red marking lines enhances visibility in smoky environments, while dual metal hook system ensures quick and reliable fixing in emergency situations. Heat-resistant treatment maintains functionality at fire scenes, making it essential safety escape equipment for professional fire brigades, high-rise buildings, and industrial facilities, providing reliable protection for over 200 fire departments nationwide.
 Military Grade Life Rope, Double Safety Hooks, High Altitude Rescue
This white military grade life rope is crafted from specialized tough polyester fibers with internal steel wire core reinforcement, coupled with dual safety hook structure, professionally tested with tensile strength up to 3000 Newtons. The dual safety hooks are made of aviation-grade aluminum alloy, providing secure and reliable locking. The rope surface features special treatment technology for exceptional grip, ensuring stable operation even in extreme weather conditions. Specifically designed for military training, high-altitude rescue, and emergency fire rescue operations, it is the equipment of choice for professional rescue personnel.
 Professional Fire Escape Rope Set, High-strength Hook, 7-piece Kit
This professional fire escape rope set features high-density steel wire core technology with load capacity of 250kg, ideal for high-rise emergency evacuation. White main rope with red marker lines design facilitates quick identification in smoke environments. Equipped with blue figure-8 descent device to control stable and safe descent speed. The complete set includes 7 professional rescue tools, with orange safety belt made of flame-retardant material, and high-strength hook capable of withstanding 3000N pulling force. Suitable for homes, office buildings, schools, and other scenarios, with 10-100 meter multiple specifications, certified by international fire safety standards.
 Fire Safety Rope Set, 8pcs, Building Escape Dedicated
This Fire Safety Rope Set is specially designed for building fire escape, featuring high-temperature resistant steel-core nylon structure with a single rope bearing capacity of 800kg, equipped with 8-piece professional escape gear. The set includes main rope, safety harness, descender, speed controller, anti-cutting gloves and other key components to meet emergency evacuation needs in high-rise building fires. The 20-meter rope is suitable for buildings under 8 floors, with all equipment passing national fire equipment testing standards, providing a reliable life passage for residences, office buildings, schools and other venues, making it essential home fire safety equipment.
Copyright © Custom Disaster - Relief Bedding: Tents, Sleeping Bags, Blankets All Rights Reserved
the professional team to service !